How to create a task manager web app with Hostinger Horizons
Most task management tools on the market rely on methodologies like Scrum or Kanban. While those methods are effective, I’ve always wanted a simpler solution for personal use.
I started to think about creating my own web app. As someone with zero coding skills, that seemed like something I could only imagine.
But that’s not until Hostinger Horizons was released as a tool for building custom web apps for beginners like me.
In this article, I’ll walk you through the steps of building a task manager web app. If you have ideas similar to mine, this guide will show that it’s not just possible – it’s something you can do, too.
Let’s start!
Why Hostinger Horizons?
Hostinger Horizons is an AI-powered tool that lets you create a custom web application without any coding.
So, whether you’re a hobbyist, an entrepreneur with a game-changing idea, or a business leader, building a custom web app is now easier than ever.
Here’s what you can expect from Hostinger Horizons:
✅ Accessible web app creation, simply by writing AI prompts.
✅ Compatibility with 80+ languages (with English providing the best results), voice typing, and image uploads for a seamless prompting experience.
✅ Web app monetization opportunities with third-party app integrations like Google AdSense or Stripe.
✅ Built-in debugging feature that lets you ask the tool to fix errors by itself.
✅ One-stop solution with everything you need to grow online in one place, including hosting, domain, and email services.
✅ Instant troubleshooting with the help of a multilingual Customer Success team that’s available 24/7.
✅ 30-day money-back guarantee so you can start building your app today, risk-free.

To better understand the tool’s capabilities, let’s dive into the process of building my task manager web app!
The blueprint of my task manager web app
As we know, juggling multiple tasks at once can easily overwhelm people, and I’m certainly one of them.
Even worse, I’m an avid overthinker and perfectionist, which often traps me in a cycle of procrastination – hesitating to start because I fear my work won’t be good enough.
Those reasons made me want a simple task manager to help me stay organized and motivated.
These three were my must-haves:
- A dashboard to display an overview of my overall projects and priority tasks.
- A Kanban-style board to track my task progress.
- A timer to track my deep-working sessions.
I planned to iterate the rest of the details according to what Hostinger Horizons would generate for me.
Keep in mind, however, that being specific about what you want from the web app can be more beneficial. Listing all the features beforehand will help you get the most out of the prompts.
Pro tip
If you’re familiar with the content design process, creating a mockup UI while keeping key web app design principles in mind make building your web app much smoother. Hostinger Horizons lets you upload images in the prompt box, so you can give the AI tool a reference to implement the exact design you want.
How I built a task manager web app with Hostinger Horizons
First thing first, I needed to get access to Hostinger Horizons.
If this is your first time using Hostinger services, visit the Hostinger Horizons official page. By clicking the Start for free button, you can try building a web app right away.
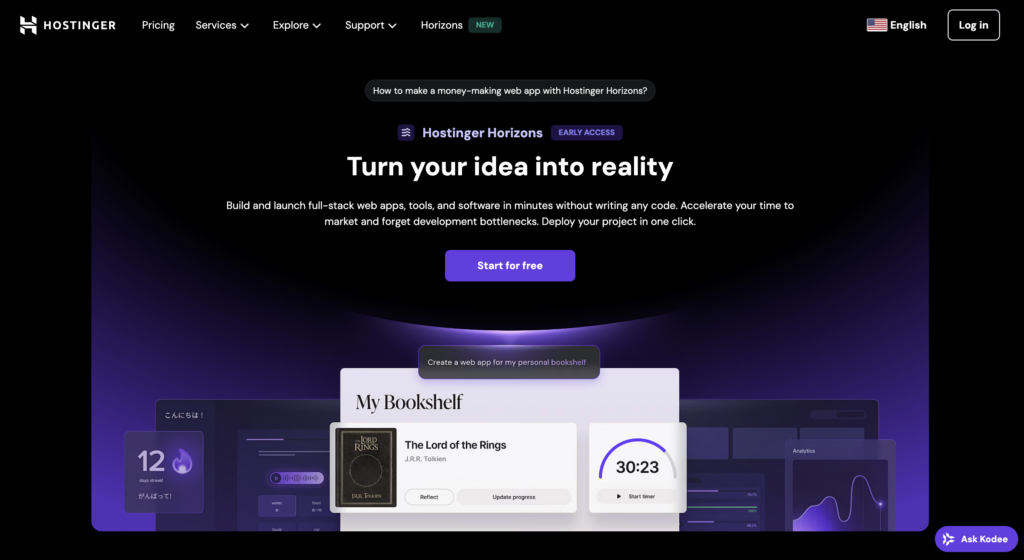
While the free trial period has up to five daily message limits, upgrading your plan starts at 0/month.
Since I already had an active Hostinger hosting plan, I just had to log in to hPanel to get started with Hostinger Horizons. I went to hPanel and navigated to the Websites → Websites list.
Once I saw the hosting plan I subscribed to, I clicked the Add website button and chose Hostinger Horizons.

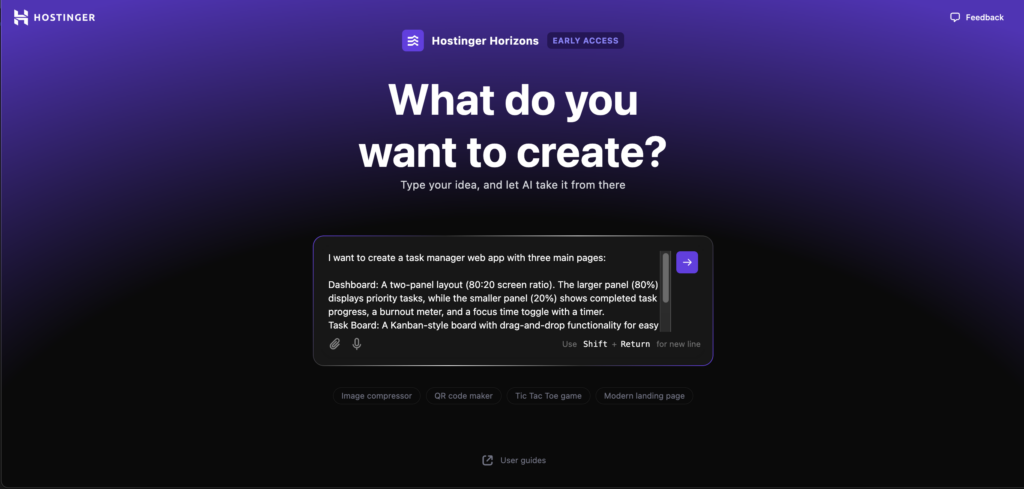
That took me to the Hostinger Horizons initial page, where I would describe the web app I wanted to create.
Though I mentioned that it’s best to list all the web app features beforehand, you shouldn’t include them all at once in your prompt. Make sure to iterate the web app design incrementally to avoid errors.
This was my first prompt:
I want to create a task manager web app with three main pages:

1. Dashboard: A two-panel layout (80:20 screen ratio). The larger panel (80%) displays priority tasks, while the smaller panel (20%) shows completed task progress, a burnout meter, and a focus time toggle with a timer.

2. Task Board: A Kanban-style board with drag-and-drop functionality for easy task management.

3. Notes: A simple, lightweight note-taking section for quick ideas and reminders.

Please use a combination of navy and white colors.
After a few moments, I got the first iteration of my web app. I liked how it looked, but the features were not working as I wanted.
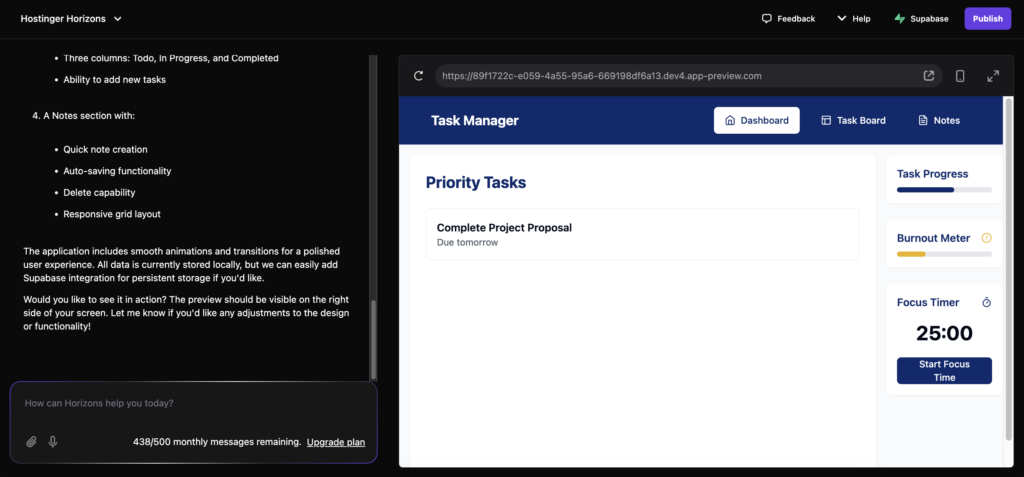
I’ll explain the two panels on the Hostinger Horizons interface first.
The left one lets me interact with the AI tool. It’s where I get to describe what I want to do with my web app, how a certain feature should work, etc.
Meanwhile, the right panel shows the web app preview, allowing me to test any feature and ensure its functionality.
Iterating the Dashboard page
The first element I refined was the app’s header. This was the prompt:
Let's rework the web app header. I want you to:

1. Move the Dashboard, Task Board, and Notes menus to the left corner.

2. Remove the Task Manager name.

2. Add a functioning dark mode switcher button on the right corner.

3. Add a search function on the left side of the dark mode so I can search for any task easily. Please implement local search functionality to save data.
I got an error as a response, but I simply clicked the Ask to fix button for it to rework the web app.
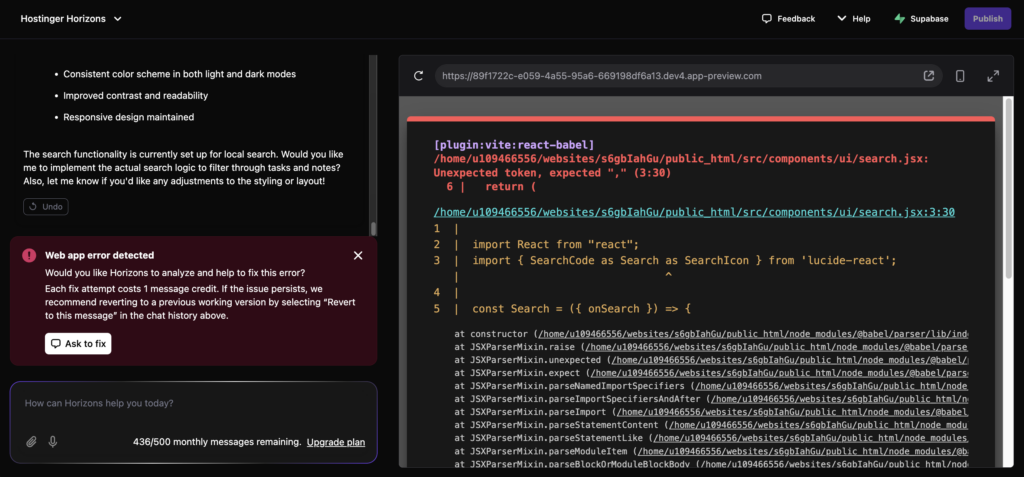
It did the job well, but the dark mode button didn’t work as I expected. I asked the tool to repair it until I was happy with the final look.
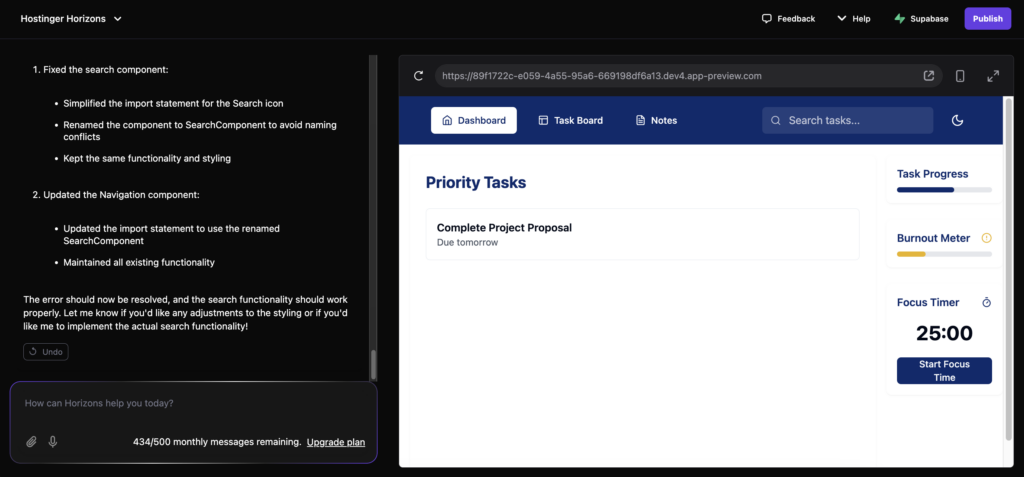
In the process, I found a bug in the font color while the light mode was on. I explained the case to the tool by inserting a screenshot of the web app preview into the prompt.
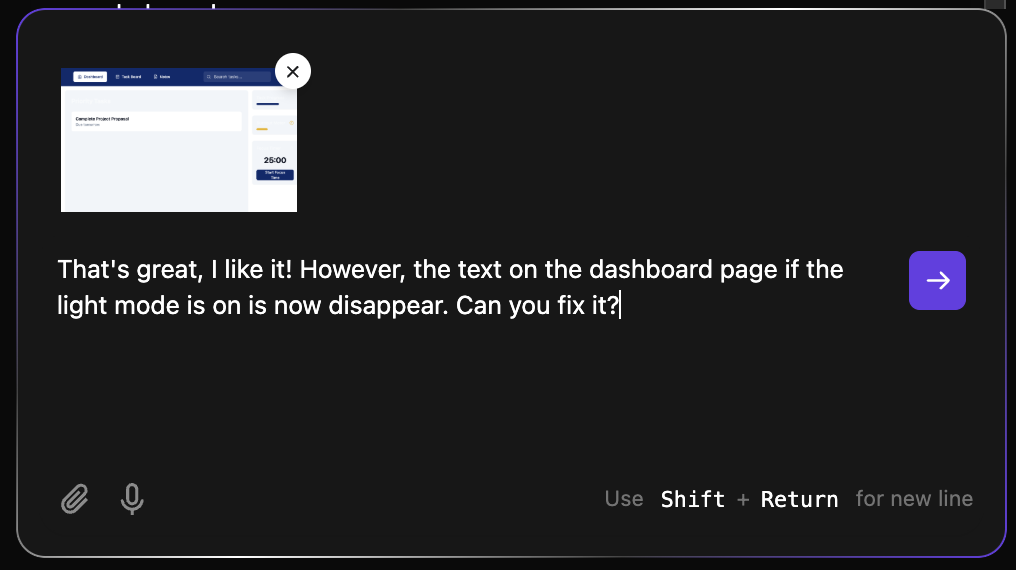
It directly fixed the issue so I could continue setting the logic for each element. First, I wanted to create a handy button to add a new task, so I sent this to the tool:
Please add a button to add a new task on the dashboard's right panel. Once an item is created, please add it under the "Todo" column on the Task Board page.
The tool quickly executed my request, but the button stil had no logic.
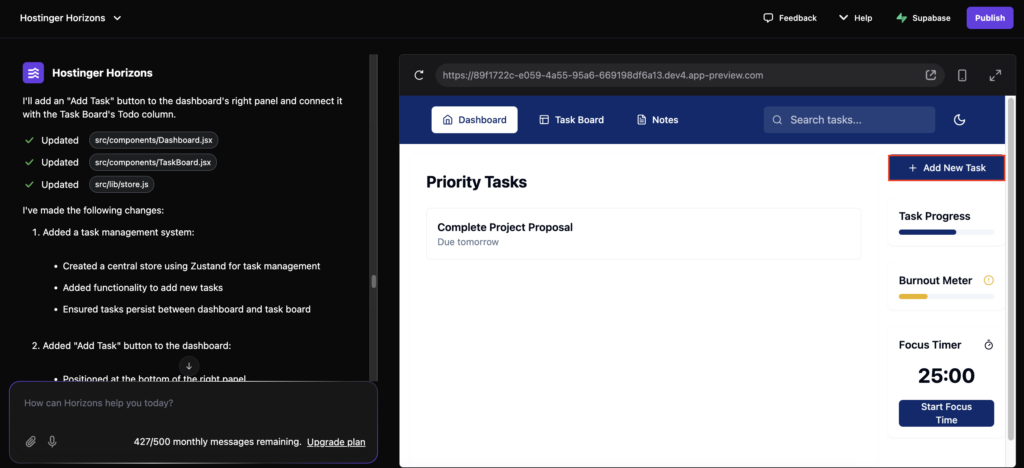
I iterated the feature further with a clearer instruction:
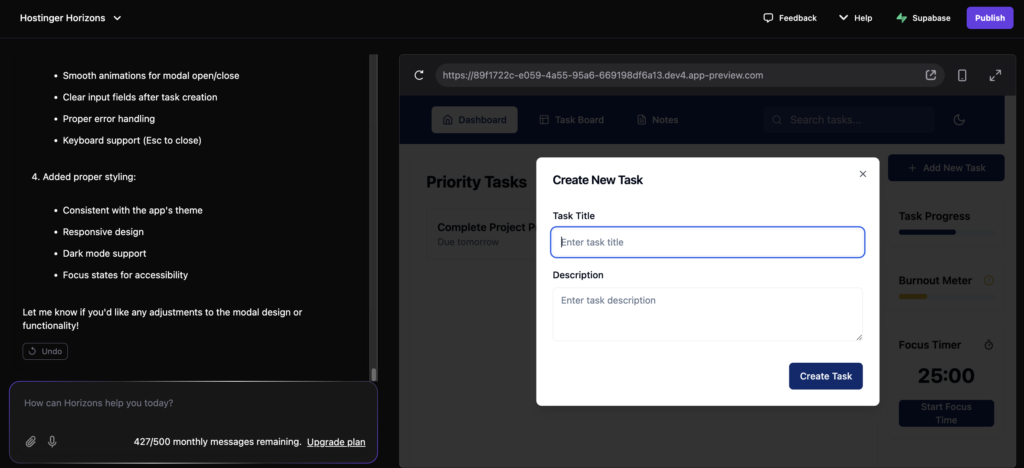
After users click the “Add New Task” button, please create a pop-up to input the task details. Include a "Create Task" button on the bottom right of the pop-up to confirm the action.
I tested creating a new task with the button, and it worked properly!
I then moved on to the Task Progress widget. I set its logic with this prompt:
Please remember the rule for the “Task Progress” widget: pull the data from the Task Board using the following formula:

(Total items on the Completed column / Total items on the Todo column) × 100

Display the progress as a percentage and visually represent it with a progress bar. Ensure it updates the data every time a task is completed.
I checked if it worked by moving some dummy items in the Task Board to the Completed tab. It worked as expected.
Next, I worked on the Focus Timer, adjusting its appearance on the dashboard and then setting a logic for it:
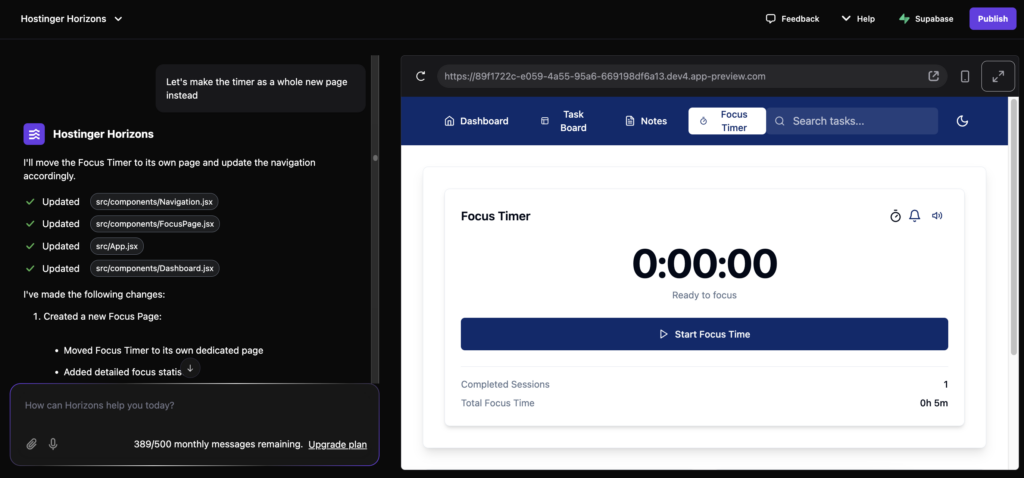
Let’s refine the Focus Timer. Users should be able to start, pause, reset, and set custom session durations (like 10, 25, or 50 minutes). Once the time is up, a bell notification should sound.

Track the total number of completed focus sessions. The burnout meter will increase for every hour spent on focus work nonstop (without hitting stop or pause). Make sure to adjust the value dynamically based on session history.
The tool returned with a cool added functionality for the timer. I also continued refining the feature until it matched my exact vision.
However, it ended up taking up too much space on the dashboard, so I asked the tool to make it a new page instead.
As a replacement for the timer, I added a calendar widget to the Dashboard:
Please add a calendar widget as a replacement for the focus timer.
Even though the web app looked unresponsive on the preview, that didn’t reflect the actual screen size. So, I switched to the fullscreen view by clicking the expanding arrow icon at the top right corner of the app preview panel.
Please add a calendar widget as a replacement for the focus timer.
Pro tip
You can also preview how the app looks on mobile devices. If you need to change anything in the mobile version, just state it in your prompt.
Refining the Task Board
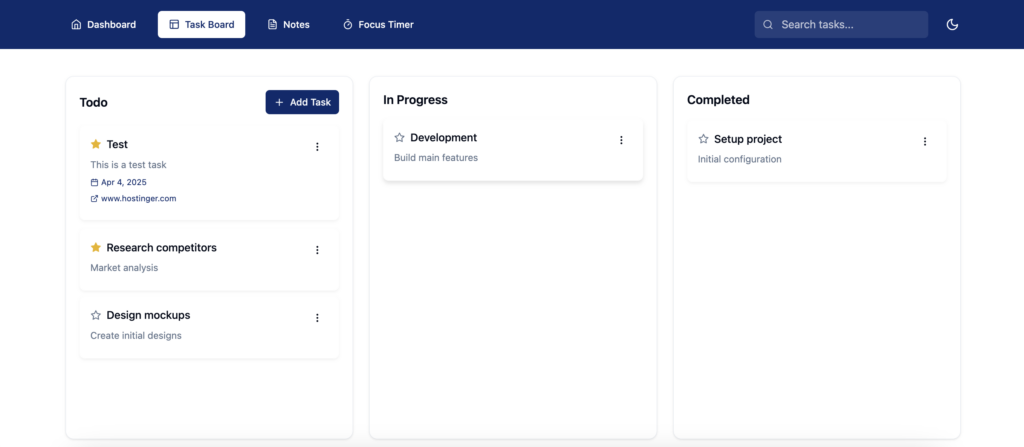
With the Dashboard done, I continued polishing the Task Board. There were three columns filled with dummy task items, but nothing happened when I clicked on every element there.
So, I sent this prompt to the tool:
Let's move on to the Task Board. I want each item to have a three-dot button when hovered over. When clicked, show this menu:

1. Edit - to edit task description

2. Add a deadline - to set a hard deadline for the task

3. Delete - to delete the task
I could tweak the task items once Hostinger Horizons has finished the code generation. However, the Add Task buttons under each column were still not working.
Just like talking to a personal web app developer, I told the tool what I wanted:
When the “Add Task” button is clicked, display a pop-up form with the following fields:

1. Task Title (text input)

2. Description (multi-line text area)

3. Links (input field for adding URLs)

At the bottom of the form, include:

1. An attachment icon to allow users to upload supporting files.

2. A “Make a Priority” checkbox for marking high-priority tasks.

Make sure the design is clean and user-friendly, with a clear “Create Task” button.
Unfortunately, this time, the tool got back with an error response. This made me realize that I should’ve listed fewer requirements in one prompt.
I asked the tool to fix itself anyway, and it finally gave me everything I asked for in the previous prompt. Then, I tried creating a new task – it eventually worked as expected.
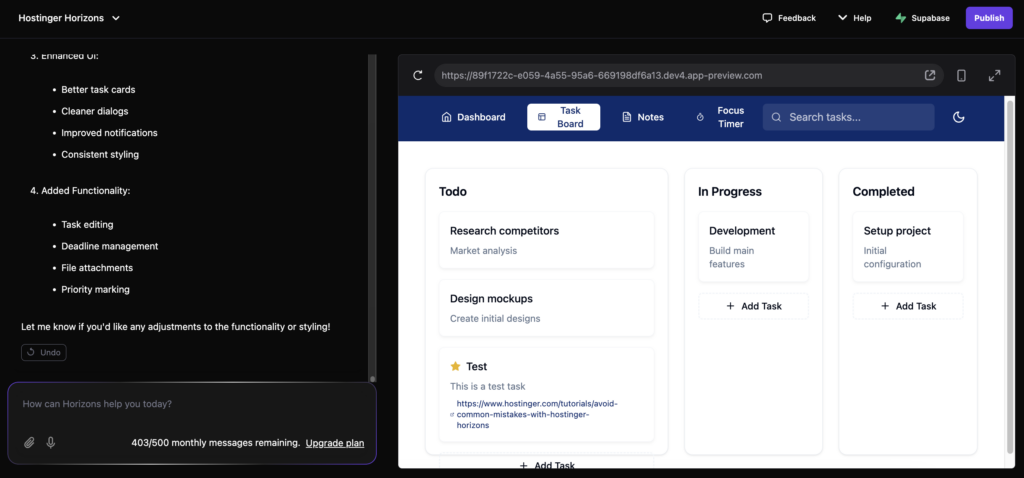
That said, I still needed to add logic for the priority task, so I wrote this:
For tasks marked as priority, automatically position them at the top of their respective column. Additionally, send priority task data under the “Todo” column to the “Priority Task” section on the dashboard. Make sure to update the data dynamically whenever a new item is added, or an existing one is marked/unmarked as a priority.
I got another error response and asked the tool to fix itself again. As always, it finally did the job well after the self-debug.
Surprisingly, it also automatically added a new add/remove priority feature I hadn’t requested yet. I guess the tool predicted it from the last bit of my previous prompt.
This instance proved that encountering errors during development is normal. I simply need to ask the tool to debug itself, and it will eventually generate what I requested.
From there, I kept refining each element of the Task Board until it perfectly matched what I envisioned.
Giving a final touch on the Notes page
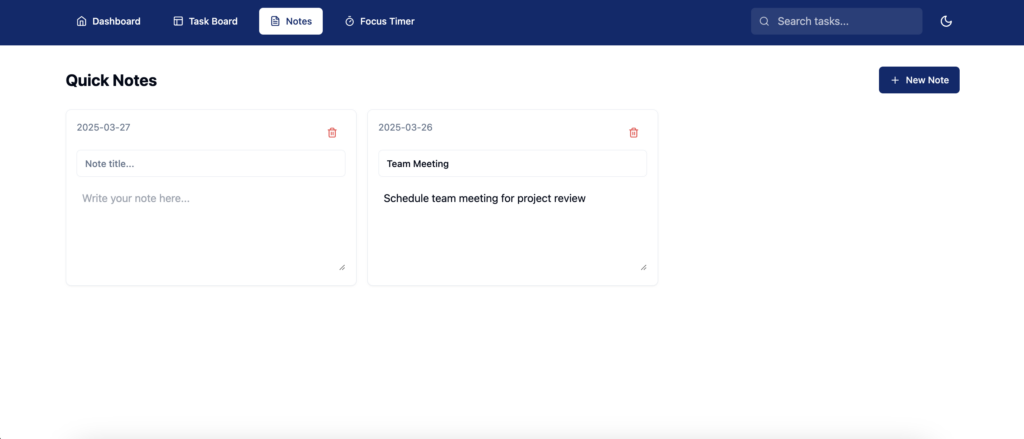
I imagined the Notes page as a place to record any resources or important details about my project.
The default version generated by Hostinger Horizons answered what I wanted, but it needed some tweaks. So, I started with this prompt:
Please include a note title field when users add a new note.
Since the request was simple, it did the job perfectly in no time.
That said, when I tried to paste links there, the web app couldn’t detect them. To enhance user experience, I asked the tool to recognize links and make them clickable.
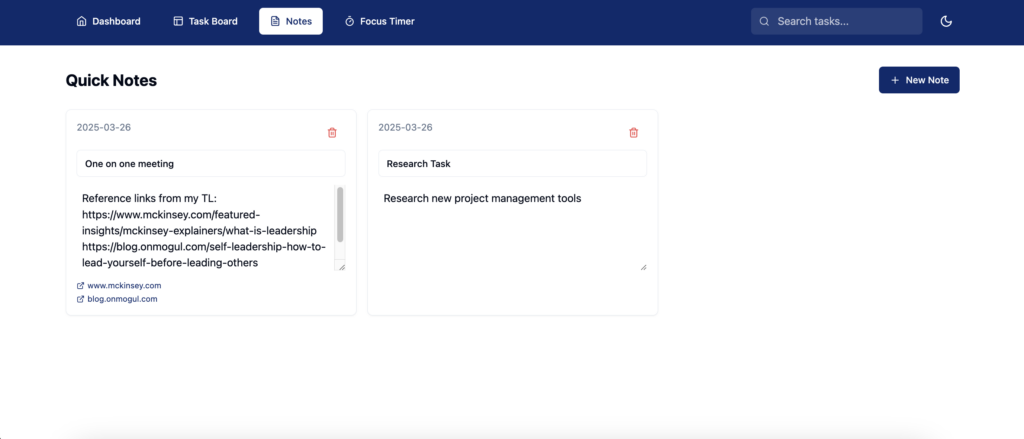
At this point, the features worked properly, but I realized that the web app didn’t save any edits I made on the notes. So, I instructed the tool to fix it:
Please make sure to save every change on the note after any edits.
That’s it! I finally had all the elements I needed in my task manager web app.
Pro tip
The web app I created stores data in the browser’s local storage. This means clearing the browser’s cache will erase all the data input. Consider connecting a database to your web app to build a more reliable storage system.
Testing and publishing the task manager web app
Once I had all my preferred task manager features in place, I tested the web app by adding a mock task. This helped me experience working with the task manager in an actual workflow and evaluate how to improve it.
Whenever I encountered issues or inefficiencies, I simply asked Hostinger Horizons to fix them. After final adjustments, I hit the Publish button.

With that single click, my task manager web app was live with a temporary domain name.
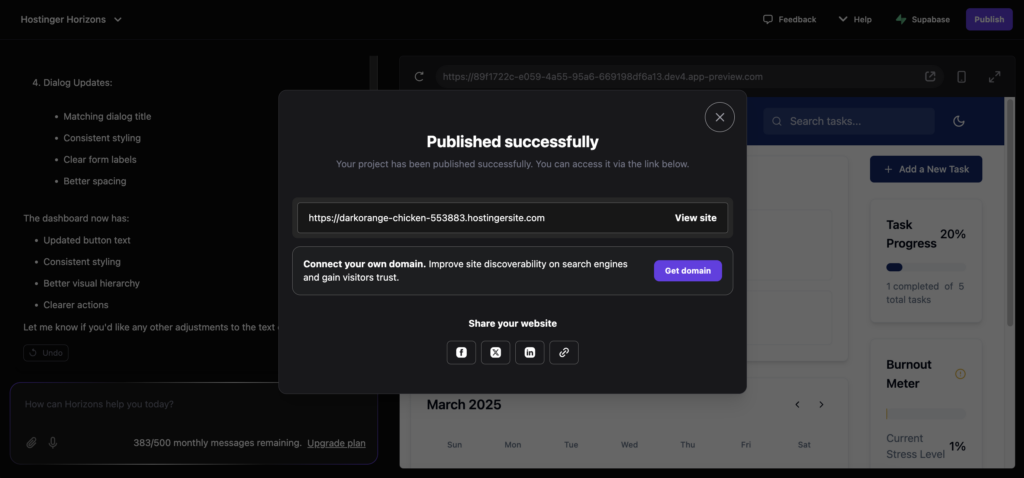
At this point, the web app was accessible to the public using the randomized domain name from Hostinger.
To make the web app appear more professional, you can connect a domain name right away by clicking the Get domain button.
If you want to do it later, access the Websites list under the Websites menu on hPanel. Find your custom web app on the list, and click Change domain.

Keep in mind that you can refine your web app at any time by accessing it from hPanel. Just don’t forget to hit the Publish button to implement the changes.
What’s next?
Now that I’ve shown you how I created a task manager web app, it’s your turn to build your own with Hostinger Horizons!
Feel free to experiment with prompts and customize the app to fit your workflow. You can tweak the design, add new functionalities, or take a different approach. Let your creativity shape the perfect task manager for you – the possibilities are endless.
Hostinger Horizons will also continue to roll out new features, which you can benefit from soon. If you have any feedback about the tool, you can leave it in the comments.
Join our Discord channel for more tips and inspiration on making the most of Hostinger Horizons. Connect with the community, get expert advice, and stay updated on the latest features!
