How to build an AI agent with n8n on Hostinger VPS
n8n is a powerful automation platform that lets you connect apps, APIs, and logic to create custom workflows without complex coding. It’s flexible, can be self-hosted, and is ideal for automating repetitive tasks across systems.
An AI agent, in this context, is a workflow powered by an external AI service that can process messages, generate responses, and even make decisions based on user input. Integrating AI into n8n allows you to build smarter, more dynamic automation, which is useful for chatbots, assistants, support tools, and more.
In this tutorial, you’ll learn how to build an AI agent using n8n on a Hostinger virtual private server (VPS). We’ll walk through the setup step by step: from installation and trigger configuration to AI integration, workflow logic, and error handling. By the end, you’ll have a functional AI-powered workflow that you can build on and adapt to your own use case.
Prerequisites
Before getting started, make sure you have the following:
- Hostinger VPS plan based on resource usage
- Minimum: 1 vCPU, 1GB RAM (KVM1)
- Recommended: 2 vCPU, 2GB RAM (KVM2)
- If you don’t yet have one, Hostinger offers a range of VPS options, all of which include a single-click n8n template
- Basic understanding of how n8n works
- A working email address for n8n setup and free license activation

How to build an AI agent in n8n
1. Install n8n
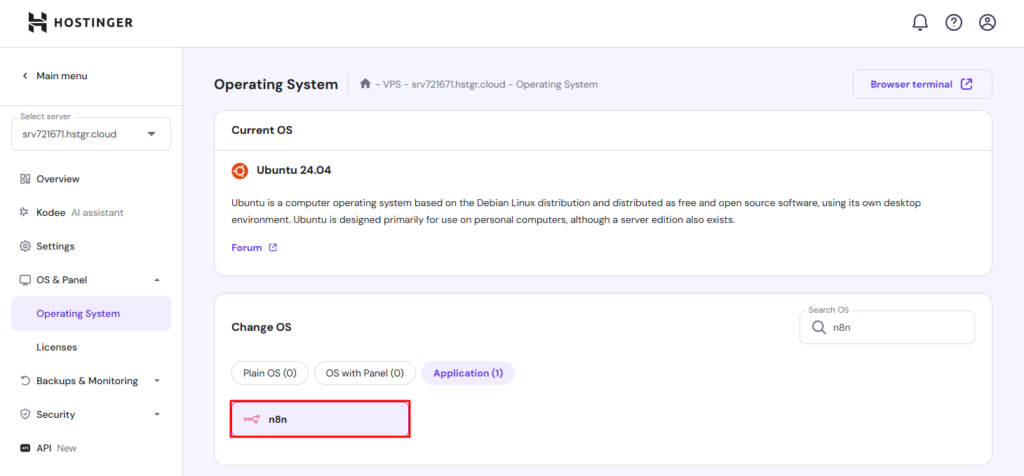
Begin by installing n8n on your Hostinger VPS using hPanel. Simply select the n8n template from the Operating System tab in the VPS dashboard. This ensures that all dependencies are properly configured, so you can start building workflows right away.
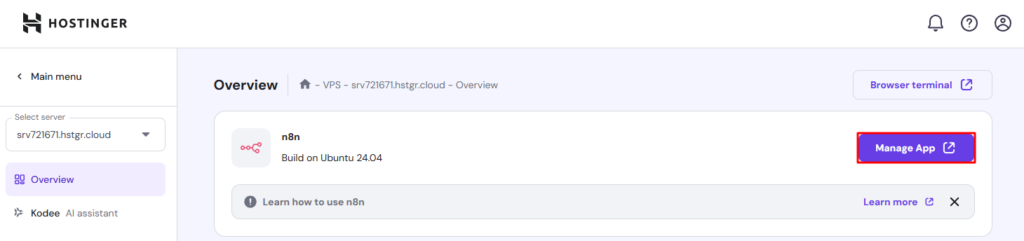
Once the installation is complete, access n8n from your VPS dashboard on the Overview page by clicking the Manage App button, which will bring you to the login page of your n8n instance.
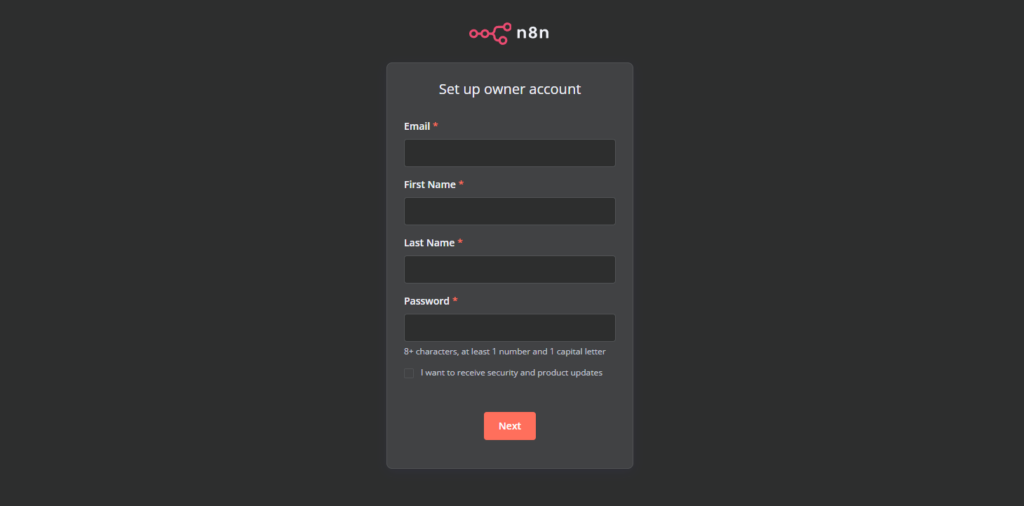
During setup, you’ll need to enter your user details by providing your email address, full name, and password that you’ll use later to access your n8n account.
Important! Make sure your email address is correct, as you’ll need it in case you ever have to reset your password.
After the successful sign-up, you’ll be greeted with two pop-ups: a brief questionnaire and an offer to unlock premium features.
To unlock the free premium features, which include workflow history, advanced debugging, and more, just enter your email address. You’ll be sent a license key.

You can then enter the license key under the Settings → Usage and plan tab.

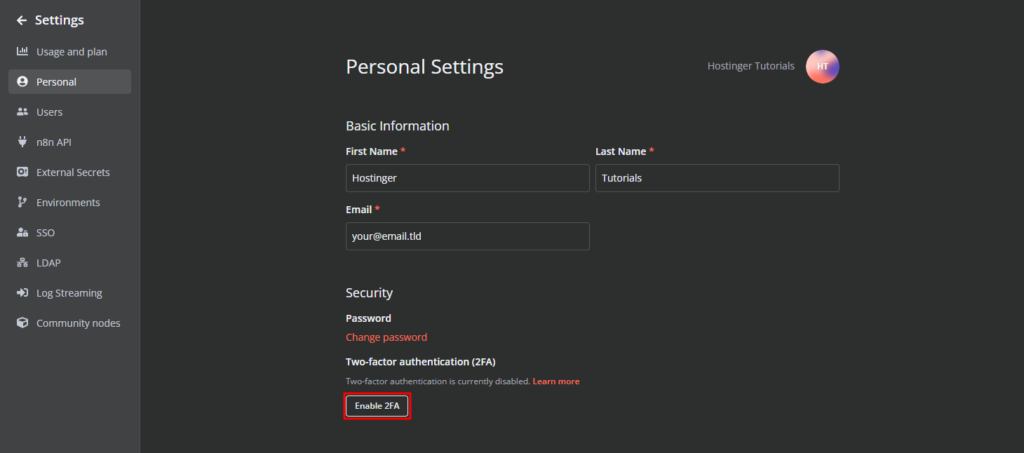
Another important feature to enable under the Settings → Personal tab is 2-factor authentication (2FA). This adds an extra layer of protection, keeping your n8n account more secure.
With these settings in place, your n8n instance is fully configured and ready for AI agent automation. Next, we’ll integrate an AI model to enhance workflow intelligence.
2. Set up your workflow trigger
Every automation needs a starting point. In n8n, that starting point is a trigger – an event that tells your workflow to start. Whether it’s running on a schedule or receiving data from an external source – such as a new message – the trigger is what sets everything in motion.
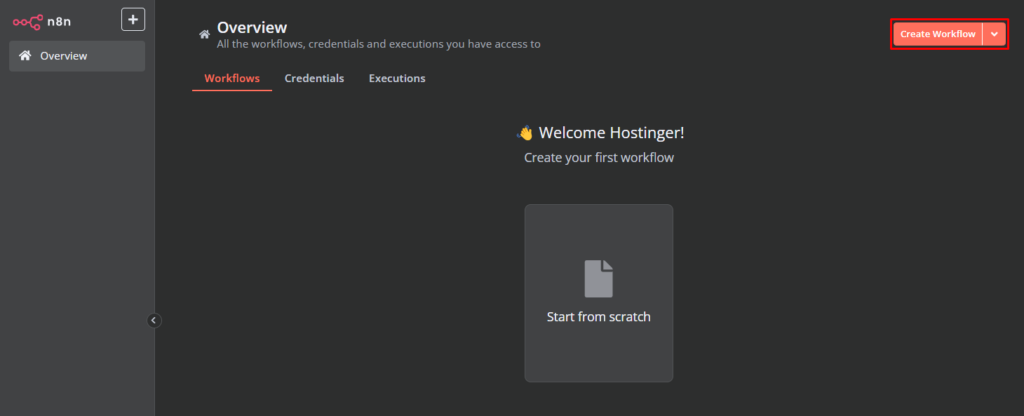
To start, go to the Workflows tab, and click Create Workflow.
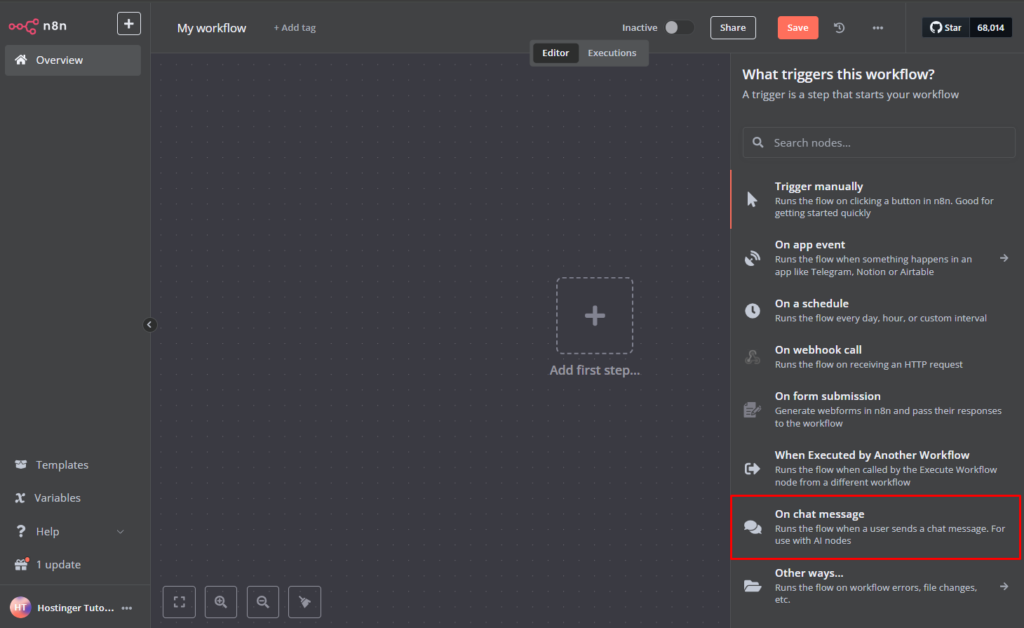
The first thing you need in your workflow is a trigger node. To add a trigger, just click the + button and choose the one that fits your needs.
For AI-driven workflows, the most commonly used triggers are:
- App event trigger – This is useful when your AI agent needs to react to messages or notifications from platforms like Slack, Telegram, or email. For example, if a user sends a message in a Slack channel, the AI agent can process the text and respond accordingly.
- Webhook trigger – Ideal for real-time automation when integrating external services. Here n8n generates a unique webhook URL that can receive data from an API, a chatbot, or any other system. Once the webhook receives a request, the workflow runs instantly.
In this tutorial, we’ll use the Chat message trigger node type because it is a simple way to test your first AI agent automation.
Once your trigger is in place, you can connect your AI model and define what actions it should take.
3. Add the AI agent service
Next, it’s time to add an AI Agent node to your workflow. The AI Agent node allows your workflow to communicate with an external AI service to process text, generate responses, or analyze data.
If you’re already familiar with API integration in workflows, you might consider integrating the AI service using an HTTP Request node. This gives you full control by manually setting the endpoints, headers, and payloads.
However, the AI Agent node offers a more straightforward and user-friendly alternative. It takes care of handling the API calls for you, allowing easy connection to services like OpenAI or Google Gemini with minimal configuration. We will use this type of node for this tutorial.
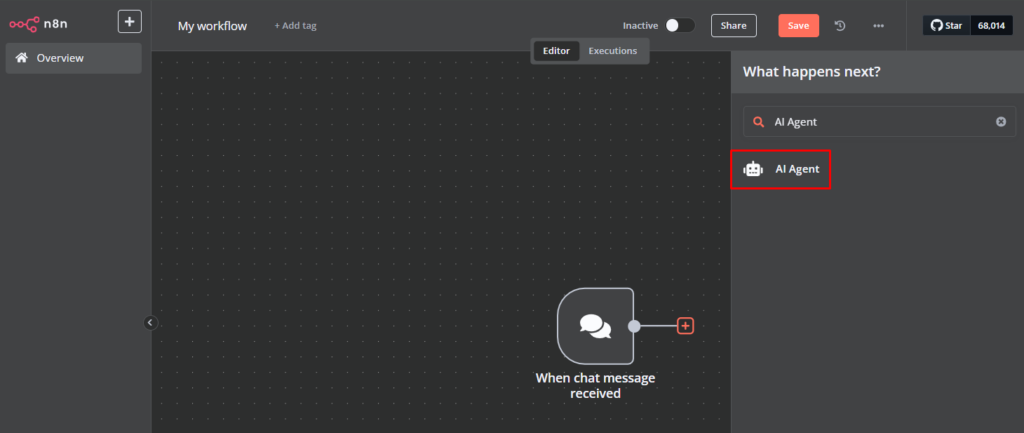
To add the AI Agent node click the + icon next to your trigger node, search for AI Agent, and add the node to your workflow.
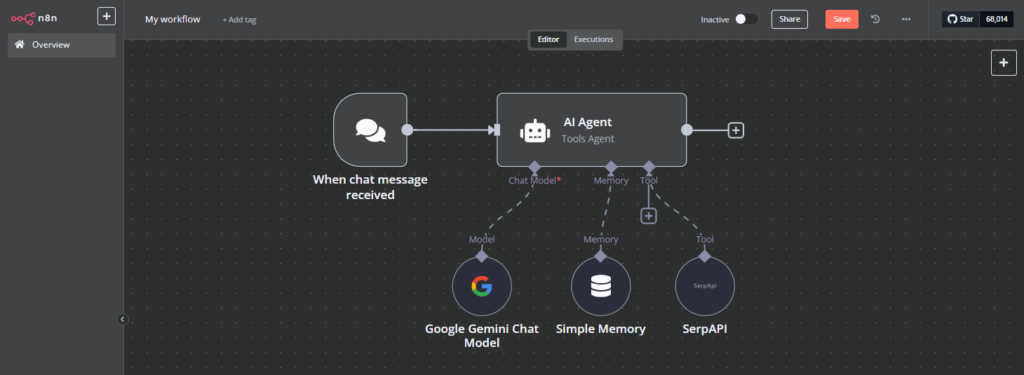
Once added, you’ll need to configure its core settings at the bottom of the node: Chat Model, Memory, and Tool.

Chat Model is required for your AI Agent node to work. In this tutorial, we’ll use Google Gemini because it offers a free tier, but you can use any of your preferred chat models.
Press the + button at the bottom of the node. Then, set up the Google Gemini (PaLM) credentials by inserting the API key that you can generate in Google AI Studio. During this stage, you can select your preferred chat model, such as Gemini 1.5 Pro.
Next, attach a Memory sub-node if you want the AI to retain context across multiple interactions. This works as a database for storing conversation history, making it useful for chatbots and ongoing conversations.
Without it, the AI would treat each request separately, losing the previous context – so the following interaction would fail:
User: Who won the last World Cup?
AI: Argentina won the 2022 FIFA World Cup.
User: What country hosted it?
AI: I’m not sure what you’re referring to. Can you clarify?
The Simple Memory option is the most straightforward because it uses internal n8n memory and does not require additional setup or credentials.
Also, the AI Agent node allows you to add a Tool sub-node – this enables the AI to interact with external applications.
For this tutorial, add the SerpAPI tool sub-node, which we will use to extend our AI capabilities by allowing it to search the web. Once added, you’ll need to register for a free account and retrieve your API key to set up node credentials in n8n.
4. Build and customize the AI agent workflow
Now that the AI agent node is set up with a chat model, memory, and search capability, the next step is to refine the workflow by adding decision-making logic and optimization techniques.
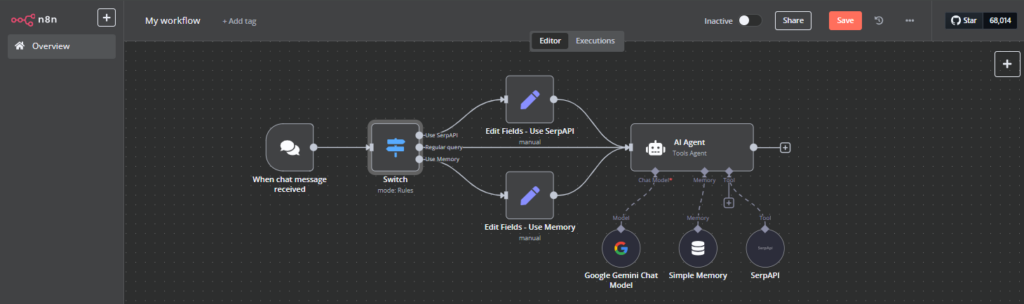
You can start by expanding how the AI processes different types of messages. To do this, add a Switch node after the trigger. This node routes the input data to specific nodes based on keywords or conditions. For example:
- If a message contains the word search, the workflow prioritizes the SerpAPI tool for retrieving real-time web results.
- If the conversation is part of an ongoing chat, ensure that Simple Memory is properly handling context so the AI can remember previous exchanges.
- If no special conditions are met, the message is sent to Google Gemini for standard processing.
This can be achieved using regular expressions (regex):

Use SerpAPI and Use Memory nodes should connect to the AI Agent through the Edit Fields nodes, while Regular query connects directly to the AI Agent.
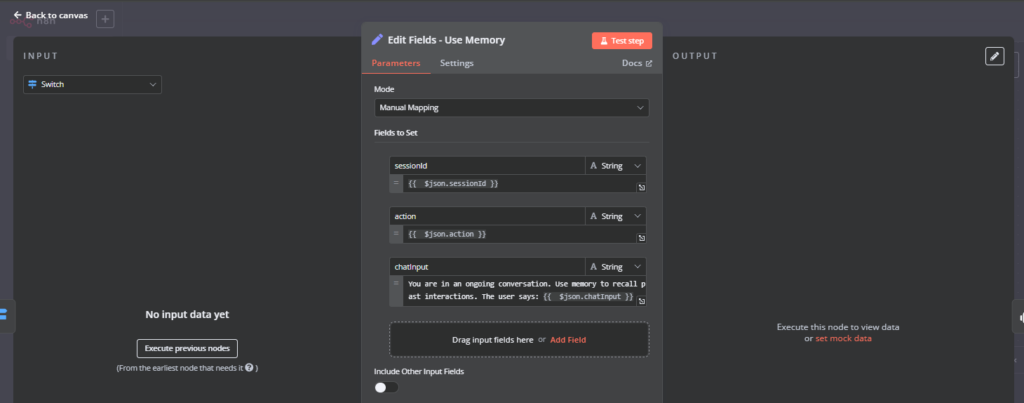
The Edit fields nodes will add the following directions to the chat input field:
- Use SerpAPI – The user wants real-time information. Use SerpAPI to find the latest answer. The user asks: {{ $json.chatInput }}

- Use Memory – You are in an ongoing conversation. Use memory to recall past interactions. The user says: {{ $json.chatInput }}
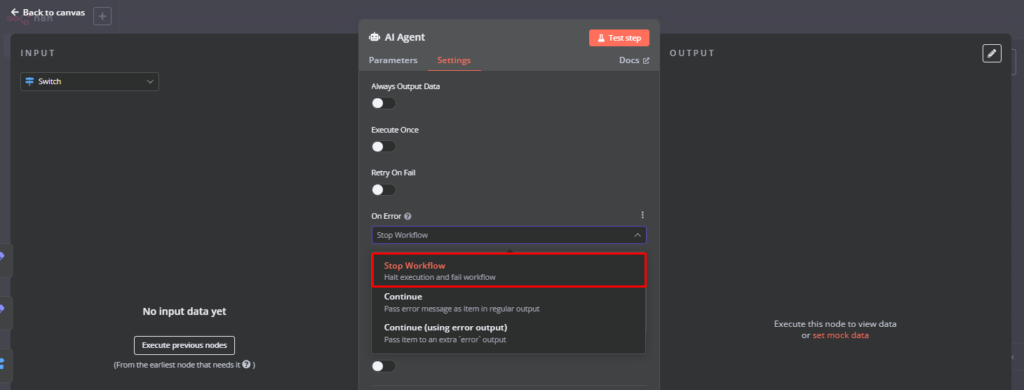
When it comes to handling workflow errors, the default setting of each node is to halt execution if an error is encountered. This approach ensures anomalies like malformed data are not passed along to subsequent steps.
If you want to be notified when an error occurs in your workflow, you can create an additional Error Workflow, which is automatically triggered when your regular workflow runs into an error.
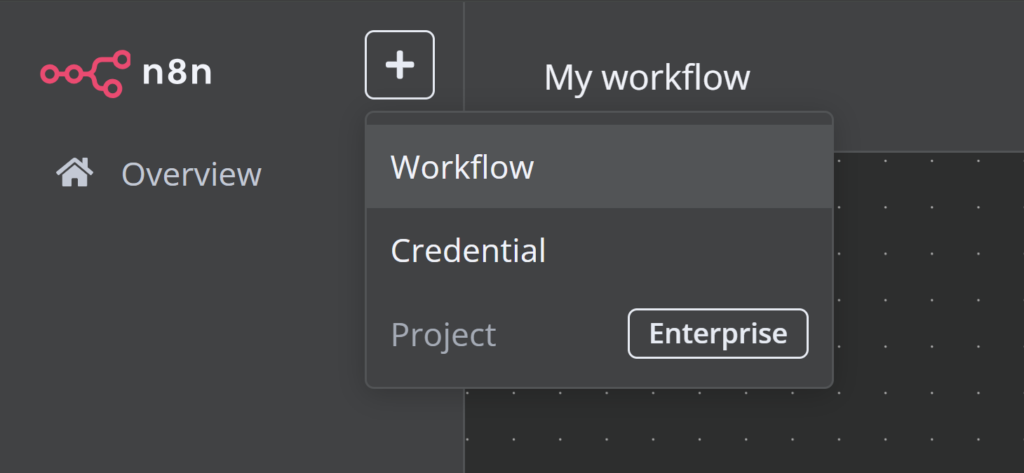
To create an Error Workflow, simply click the + icon at the top left corner of the page, select Workflow, and name it Error Workflow.
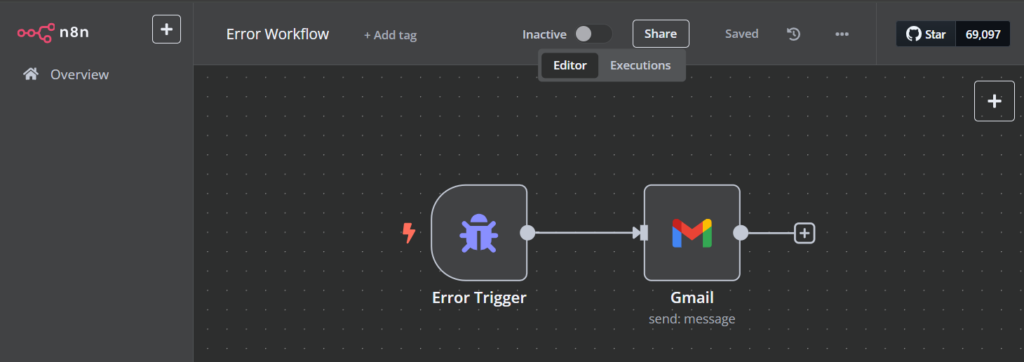
In the new workflow, add the Error Trigger node. You can connect it to any application node you want to use for notifications, for example, Gmail.
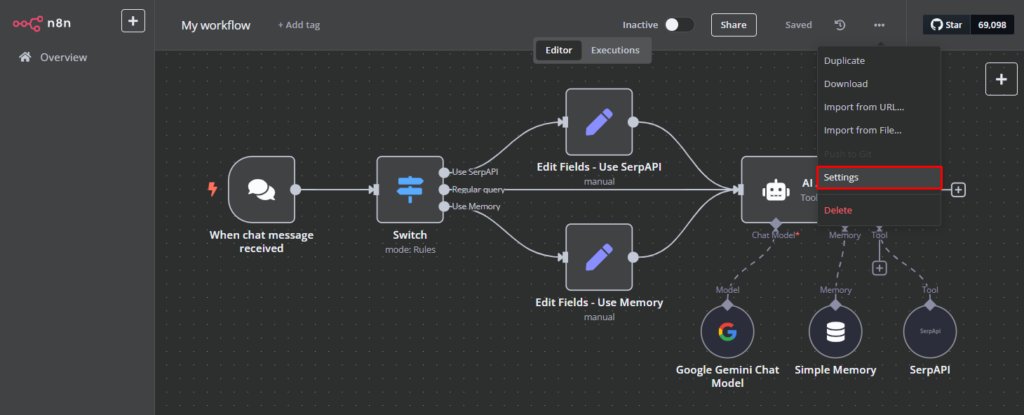
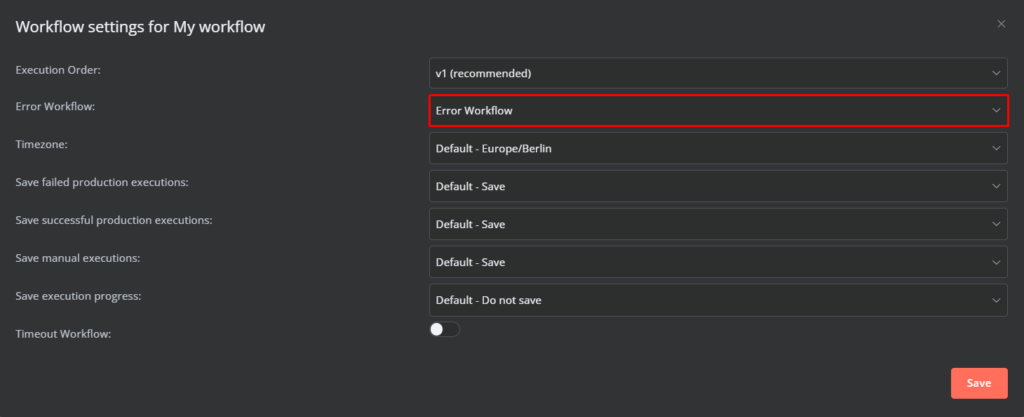
Back in the AI Agent workflow you can open Workflow Settings and set the Error Workflow to the one you have just created.
Now, if your workflow runs into an error you’ll get an email notification, ensuring you can promptly address issues in your automation.
Important! You can’t test error workflows when running workflows manually. The error trigger only gets triggered when an automatic workflow runs into an error.
5. Test and debug the workflow
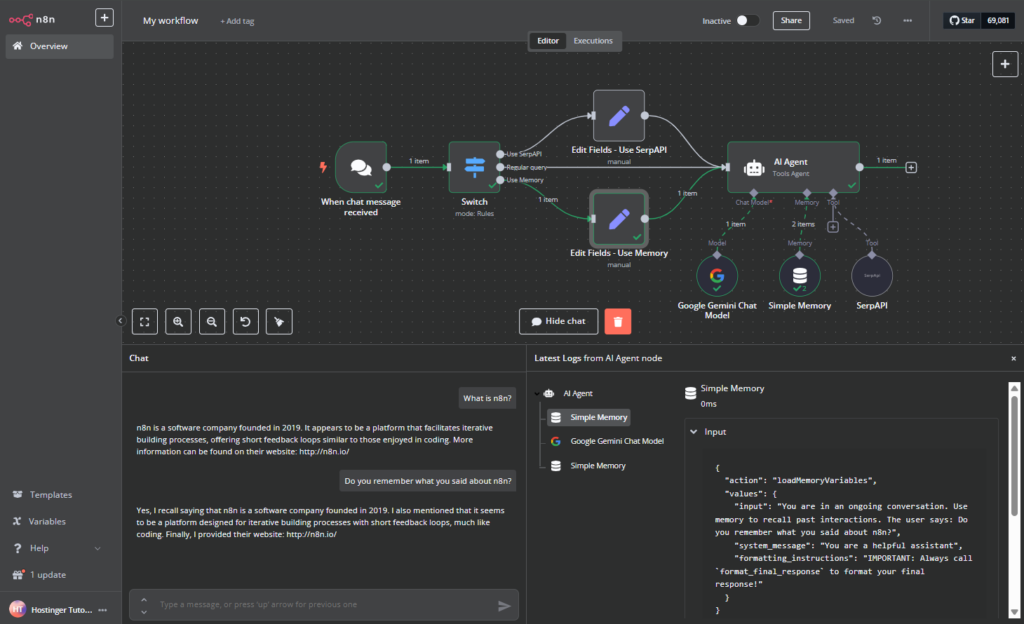
At this point, a fully functional AI agent is now integrated into your n8n workflow. You can test it by clicking the Open Chat button at the bottom of the screen and sending a sample message.
When testing, send different types of messages to make sure the AI responds appropriately based on the input. Notice how different workflow routes are triggered when specific keywords are detected.
For example, try asking a generic question and wait for the response, then follow up by asking your AI Agent if it can remember what it told you previously. You can see the triggered workflow path highlighted in green.
If you receive a notification that your workflow ran into an error, you can review and debug in the Executions tab.

To find out where your execution failed, look for the node marked in red with a warning icon. Double-click the node to see the full error message, which often includes an explanation of exactly why the error occurred and a hint on how to fix the issue.
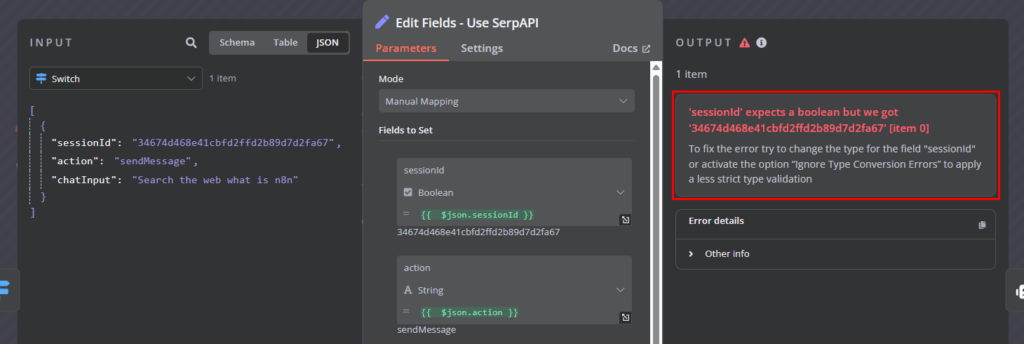
In this example, the error is caused by a common issue: a mismatch between the expected and actual field types. The sessionId field is received as a string, but the Edit Fields node expects a boolean. This can be fixed easily by changing the expected field type to string.
Conclusion
You’ve now built a fully functional AI agent using n8n on a Hostinger VPS – complete with chat capabilities, memory, tool usage, and smart routing logic. With this setup, your automation can process input, make decisions, search the web, and even recall past interactions.
From here, you can keep expanding. Add more tools, connect more apps, or plug this AI agent into your existing systems. The foundation is in place, so you can shape it to fit your use case.
How to build an AI agent with n8n FAQ
What is an AI agent?
An AI agent is a system that takes input data, figures out what it means, and responds or acts accordingly. It connects to an AI service, like OpenAI or Google Gemini, and can be part of a larger workflow. You’ll see AI agents used in chatbots, virtual assistants, and support tools.
What can AI agents do?
AI agents can answer questions, summarize info, or take action inside a workflow. Some handle back-and-forth conversations, while others merely process data and return single results – it depends on the use case. When combined with automation tools like n8n, they become pretty adept at handling tasks you’d otherwise need to do manually.
What are the benefits of AI agents?
AI agents help you save time and reduce manual, repetitive work. They’re available 24/7, respond instantly, and can scale across teams or services without needing extra staff. They’re useful in various situations, ranging from automating replies to making decisions based on incoming data. Over time, they can help streamline processes and improve how systems respond to people.

Dovydas has worked in cloud engineering and IT operations, focusing on maintaining and improving complex systems. He’s especially interested in software development and automation and is always looking for ways to make things more efficient and reliable. You can find him on LinkedIn.