How to build AI workflows in n8n: 4 tutorials
The workflow automation platform, n8n, allows you to integrate AI into workflows with ease. Whether you’re a developer, IT specialist, or entrepreneur, you can have a powerful and highly customizable way of building AI workflow automation without the need for advanced coding skills.
This guide will walk you through creating tailored AI workflows in n8n using Hostinger’s VPS hosting. It covers four crucial AI-based workflows:
- Data integration and ETL
- Lead generation with AI enrichment
- DevOps automation (CI/CD & testing)
- AI-powered data backup and archiving
Each workflow includes step-by-step instructions to help you execute every step seamlessly. By the end of this guide, you’ll have gained valuable knowledge and hands-on experience to build and customize effective n8n automation workflows to meet your unique needs.
For even more n8n workflows and a visual walkthrough on setting up n8n on Hostinger VPS, check out this video guide by Valentinas, Head of VPS here at Hostinger:
Prerequisites
Before you begin automating AI workflows, ensure you have the following:
- An active Hostinger VPS hosting account with the n8n template installed.
- API keys and access credentials for platforms such as Google Cloud, OpenAI, or Claude AI.
- You should also have accounts with or be familiar with the APIs of various tools and platforms, such as POSTMAN, My JSON Server, Airtable, People Data Labs, Slack, and GitHub.
- You’ll need to know how to format data with JSON.
- Basic familiarity with n8n’s interface and node configuration.
If you need help setting up n8n on your VPS, check out our n8n installation guide.

Building AI workflows in n8n
Let’s explore four AI-powered workflows you can create in n8n. Each section includes step-by-step instructions.
Building an ETL workflow for data integration in n8n
Extract, transform, and load (ETL) workflows are essential for automating data integration across multiple sources. In this section, we’ll focus on how to build an ETL workflow in n8n.
Whether you need to pull data from APIs, clean and transform it, or load it into databases or cloud storage, n8n provides a low-code ETL solution with powerful customization options.
By the end of this section, you’ll understand how to create an automated ETL pipeline in n8n, making data integration more efficient and scalable.
Why does it matter?
This workflow automates the entire ETL process in n8n, ensuring that data flows smoothly from extraction to transformation and storage.
Steps:
- Set up a Webhook node:
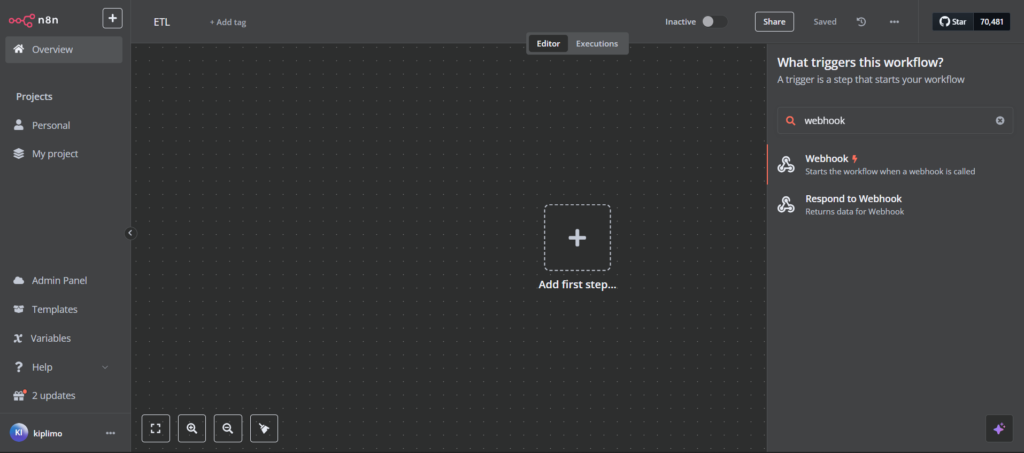
- Click the + (Add Node) button in the center or in the top right corner of the n8n workflow editor.
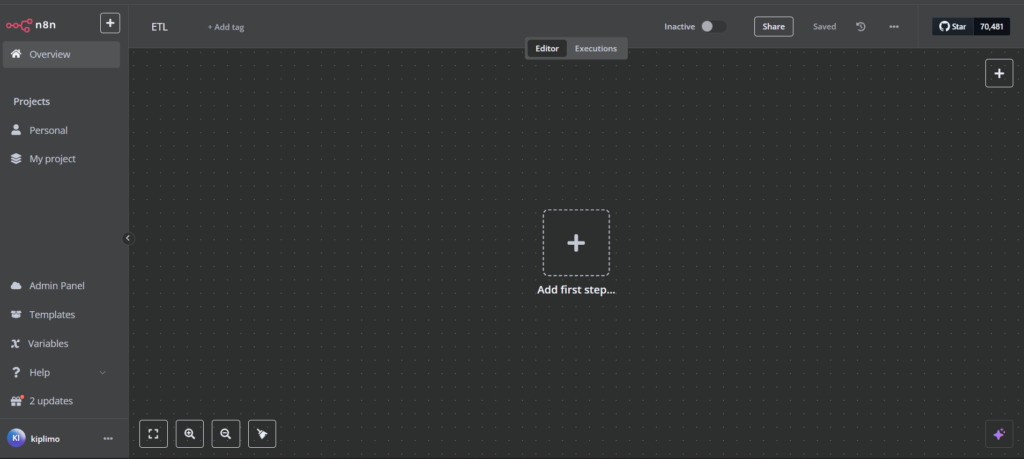
- In the search bar, type “webhook” and select the Webhook node.

- Set the HTTP method to POST to receive external data.
- Click the POST URL above the HTTP method to copy it.
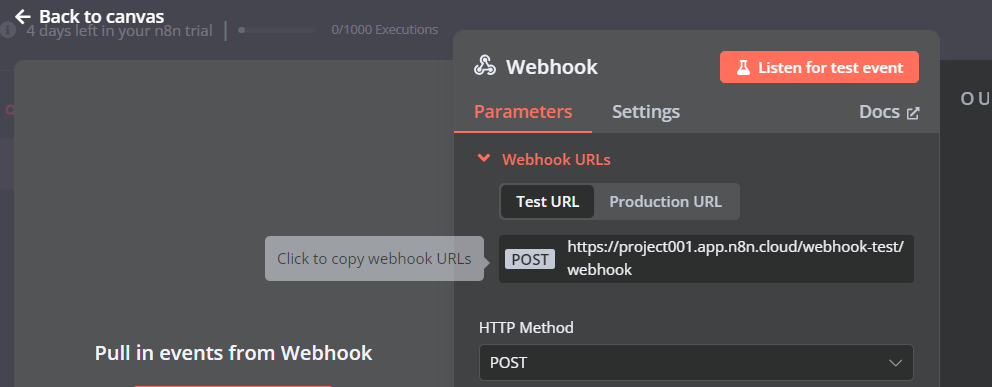
- Click Listen for test event to capture test data.
- You can sign up for a free account with POSTMAN to send your POST request – in POSTMAN, click New, choose HTTP, choose POST, then paste your test URL in the field provided and click the Send button. The results will be displayed in the OUTPUT screen on the right.
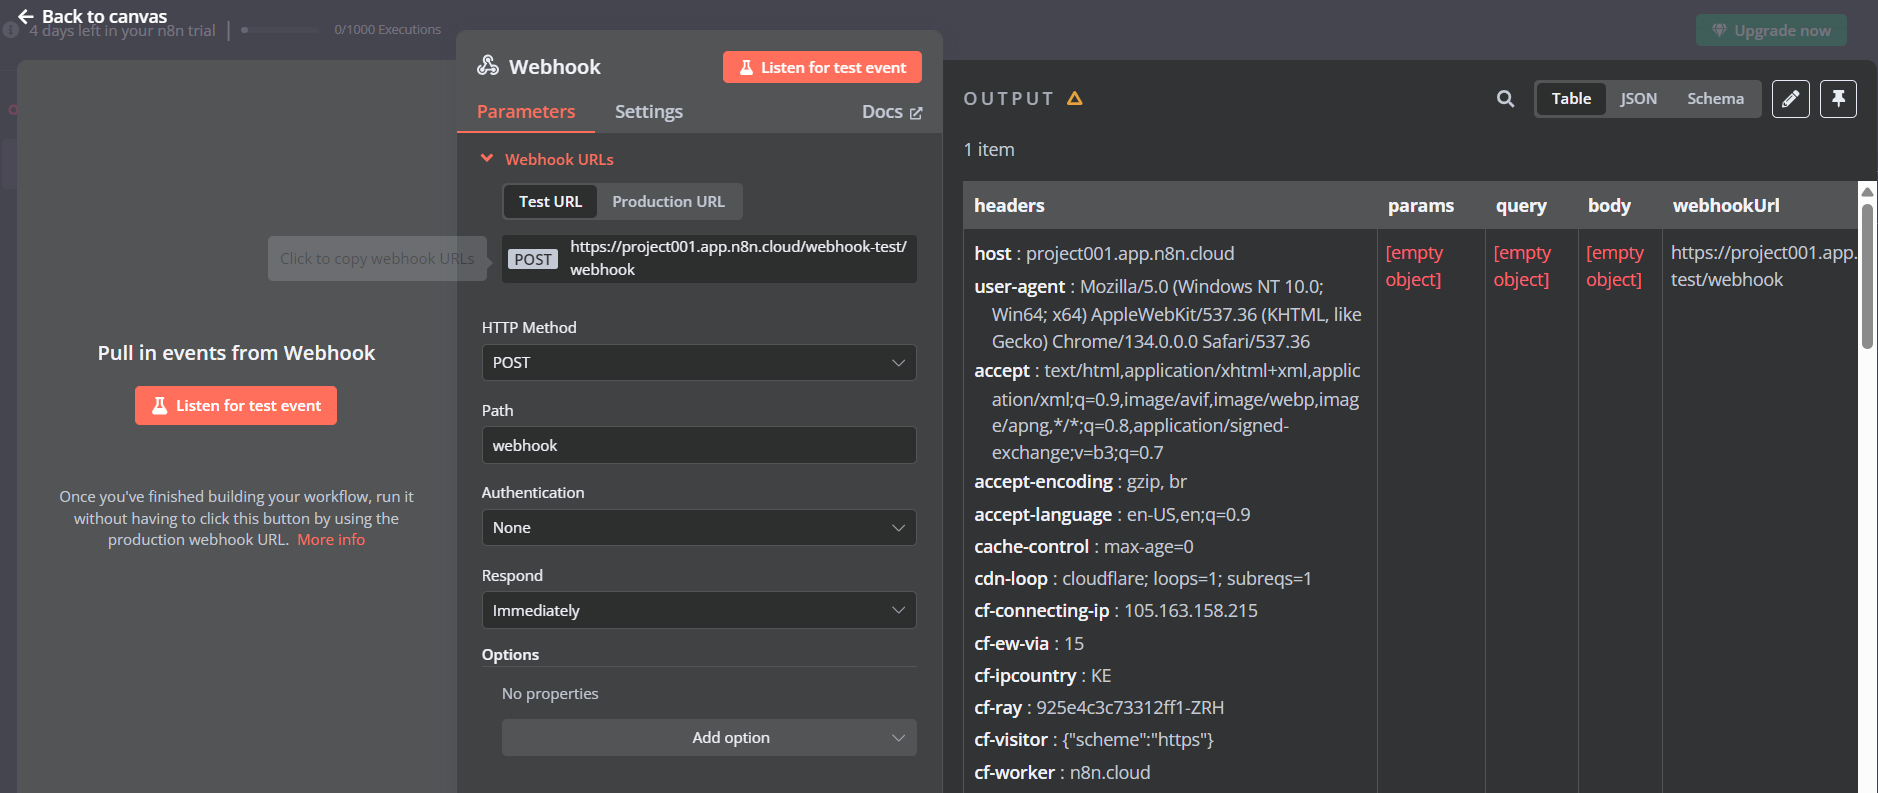
- Save (CTRL+S on Windows or Cmd+S on macOS), then return to the canvas and hover over the node. You will see four buttons. Click Test step or Test workflow to repeat the test.
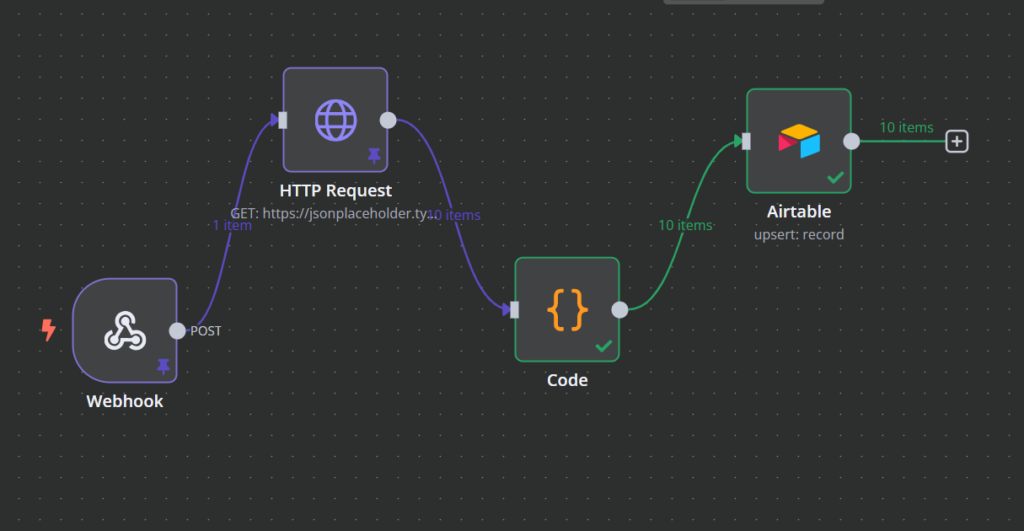
The Webhook node acts as an entry point to receive data from an external source. Setting it to POST ensures that data can be sent to it for processing.
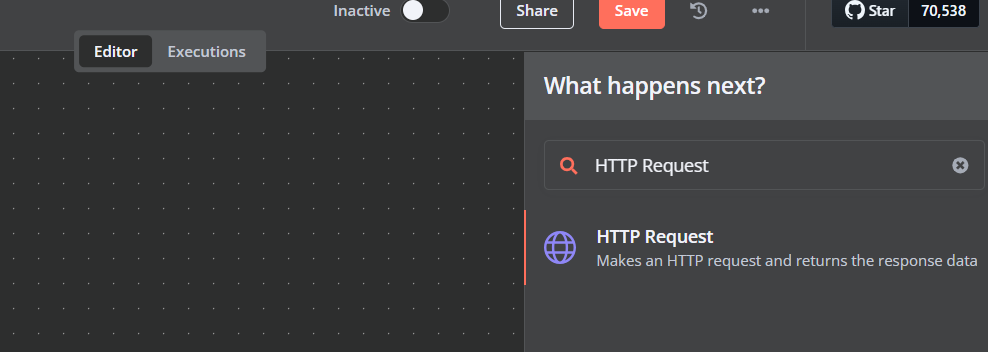
- Extract data using an HTTP Request node:
- Click + (Add Node) and search for “HTTP Request.”
- Select the HTTP Request node and connect it to the Webhook node by dragging the arrow onto the HTTP Request node.

- Double-click on the HTTP Request node to open its settings.
- In the settings, choose Get as the HTTP method.
- Enter the API URL that provides the structured data. You can use a test URL from My JSON Server.
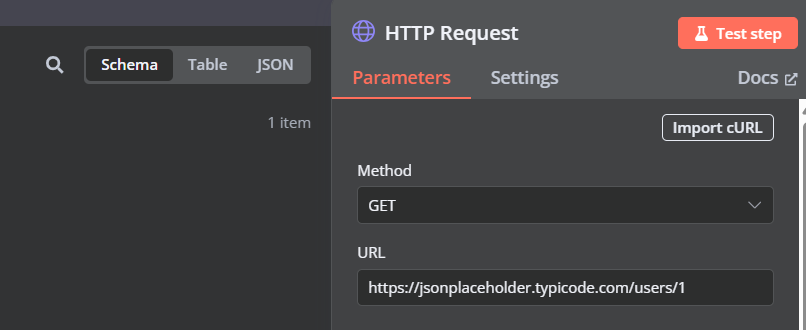
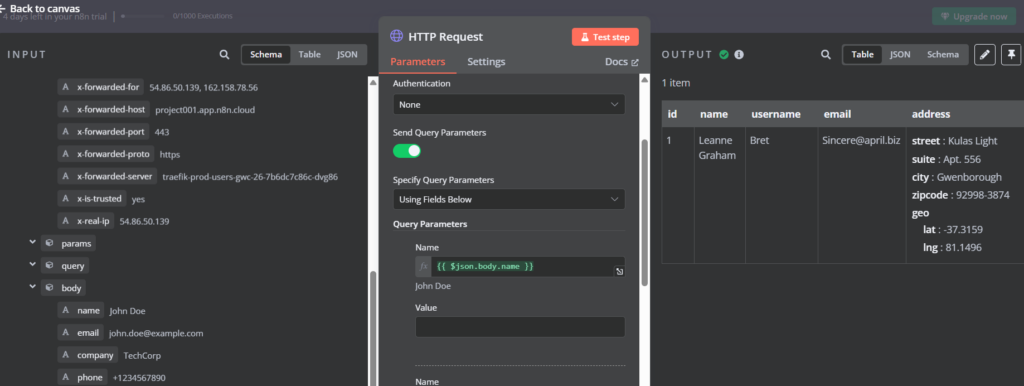
- For the Query parameters, add the fields you are fetching, such as Name, Email, or Address.
- Click Test step to fetch the test data.
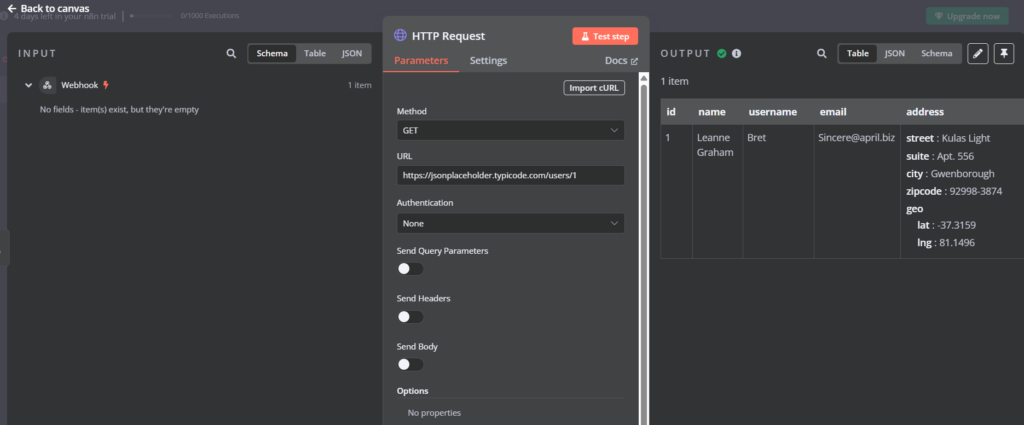
The HTTP Request node is used to pull structured data from the API. In this case, the API returns a list of users, which can be processed in the next steps.
- Transform data using the Code Function node.
- Click + (Add Node) and search for “Code.”
- Select the Code Function node to open its settings.
- Modify the output data structure using JavaScript.
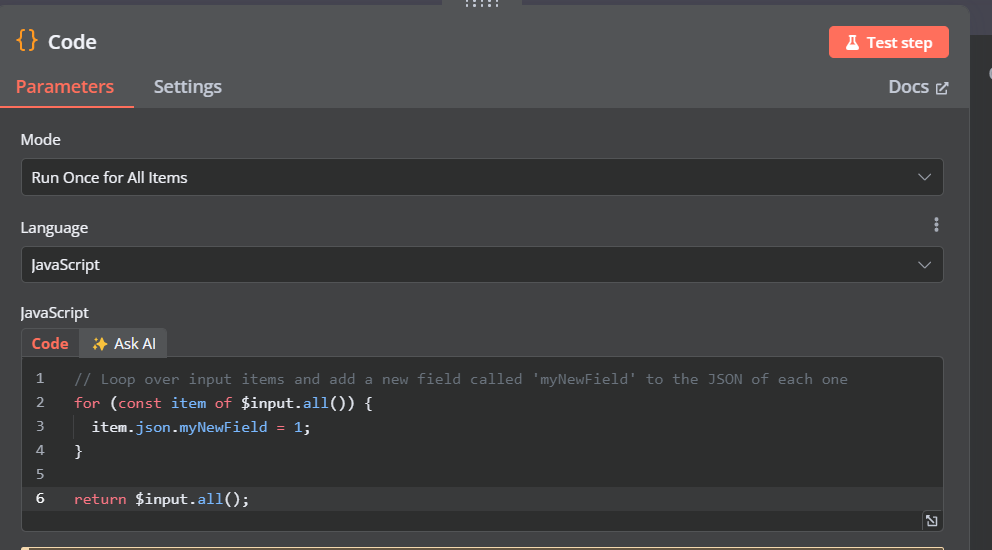
- Save, then click the Test step button to test the transformation.
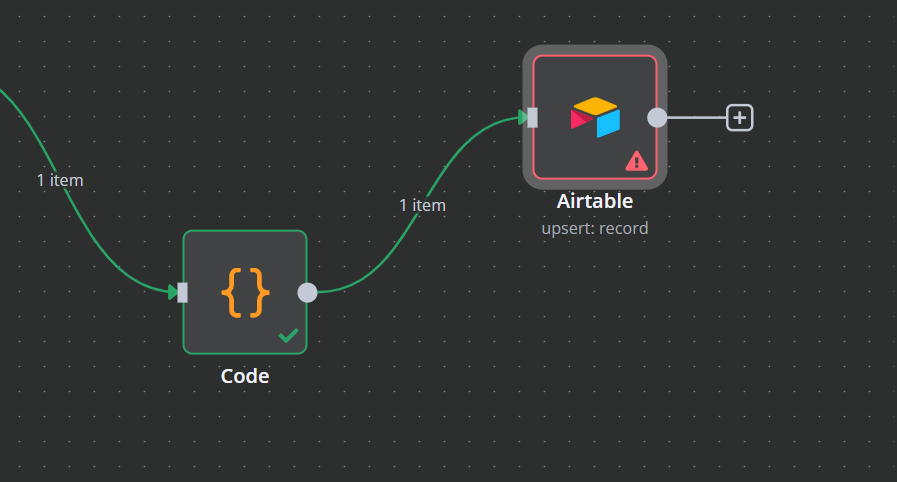
The Code Function node allows you to manipulate and format data before storing it. You use JavaScript code to clean, filter, and structure the data to match your needs.
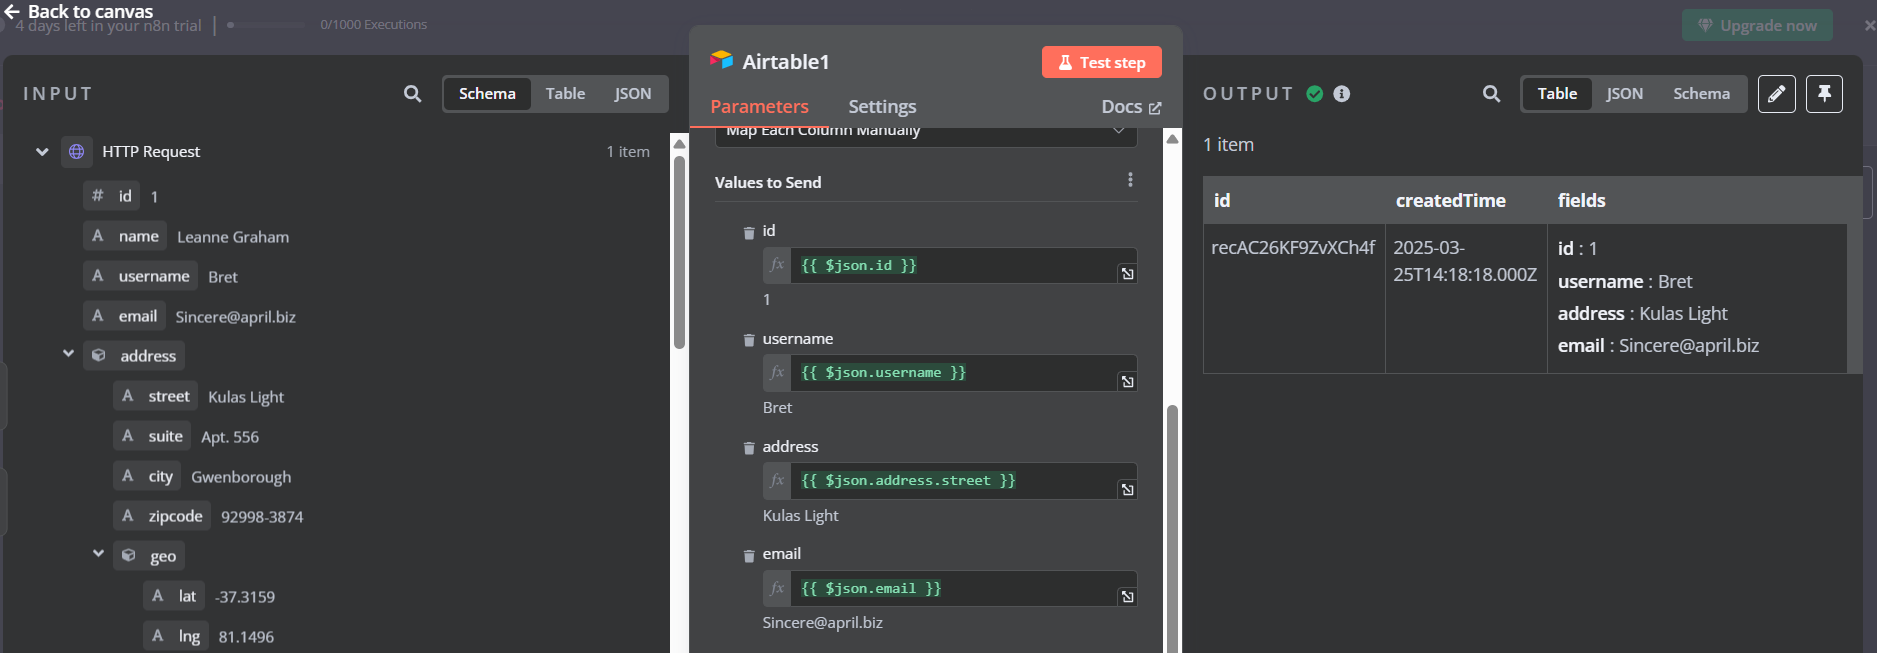
- Load data into the Airtable workbench.
- Click + (Add Node) and search for “Airtable.”
- On the dropdown list, pick Create or update a record.
- Return to the canvas, select Airtable, and connect it to the Code Function node.
- Double-click on the Airtable node to open its settings.
- Choose Create or Update as the operation and map the fields – you’ll need to set up credentials for Airtable for this test to work, and you’ll to select the appropriate Base and Table in the Airtable settings.
- Click Test step to insert test data.

- Finally, save your work then return to the canvas and click Test workflow. Ensure the transformed data is stored properly in Airtable for future use.
This automated ETL workflow in n8n streamlines data integration without complex coding. Whether it’s aggregating customer data from multiple sources, syncing financial records across platforms, or preparing clean datasets for AI models, this approach ensures efficiency and accuracy.
Building an AI-powered lead generation workflow in n8n
Generating and qualifying leads manually can be time-consuming and inefficient. With n8n, you can automate the entire lead generation process by integrating AI-driven insights to analyze customer interactions, score leads, and trigger personalized outreach.
Why does it matter?
This workflow in n8n automates and optimizes the sales pipeline without complex coding. By capturing lead data, enriching it with AI insights, and seamlessly storing it in a CRM, you can identify high-value prospects and personalize outreach more effectively.
Steps:
- Trigger lead capture using Webhook:
- Click the + (Add Node) button in the top right corner of the n8n workflow editor.
- In the search bar, type “webhook” and select the Webhook node.
- Set the HTTP method to POST because we will receive data from a source.
- Click Copy Webhook URL – this is shown by hovering over the link on the Events link to the left or the URL link above the HTTP method – and integrate it with a form in a website. Many form-building tools don’t allow direct integration with Webhook URLs, but plugins like WPForms or Gravity Forms support webhook add-ons that let you send form data to any URL.
- Click Listen for test event to capture test data. You can paste the URL into a POST request in POSTMAN to test this.

The Webhook node collects lead information from a form submission and passes it to the next step.
- Extract contact data using the HTTP request node:
- Click + (Add Node) and search for “HTTP Request.”
- Select the HTTP Request node and connect it to the Webhook node.

- Click on the HTTP Request node to open its settings.
- In the settings, under the HTTP method, choose GET.
- Enter the API URL from a service that provides structured data, such as People Data Labs.
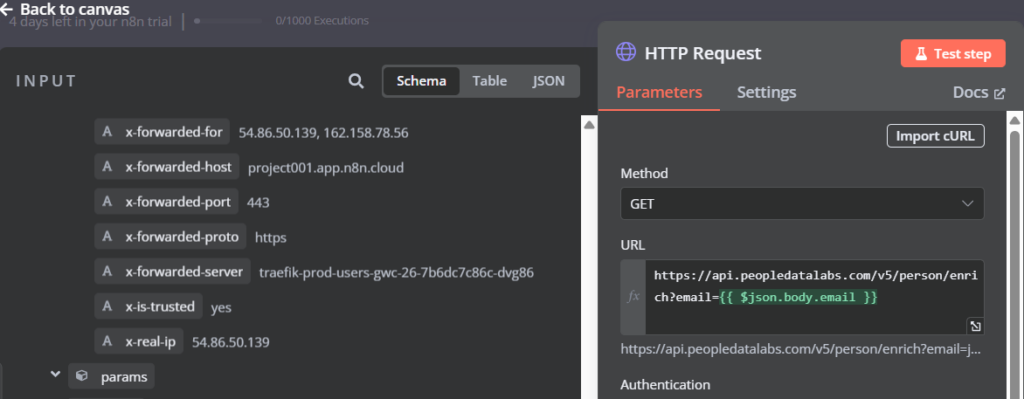
- Save, then click Test step to see the API response.
This step enriches lead data by fetching additional information, such as media profiles.
- AI-powered analysis and scoring:
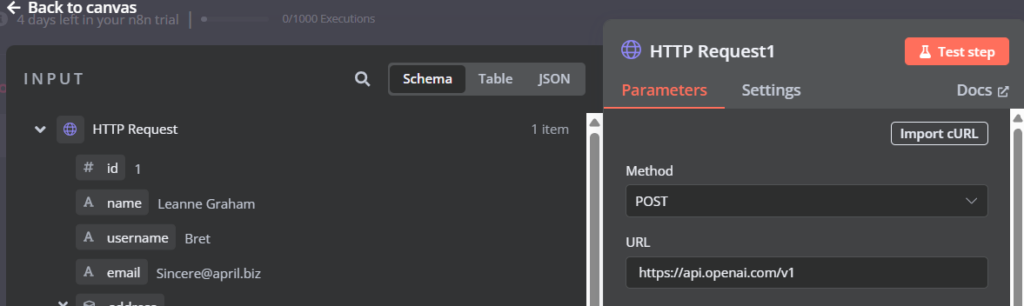
- Click + (Add node) and add an HTTP Request node.
- Set HTTP Method to POST.
- Enter an API URL from an AI service such as OpenAI. You’ll need to specify the model (i.e gpt-4) and format the request body properly with your lead data in the prompt.
- Click Add parameter and select Headers. You’ll need to include code in the Body Parameters section to structure your request to OpenAI.
- Specify Predefined Credential Type under Authentication. Under Credential Type select OpenAi and lastly, under OpenAi, choose + Create new credential in. This will take you to a page where you can add the API key and the base URL.

- Navigate back to the canvas and connect this node to the previous node.
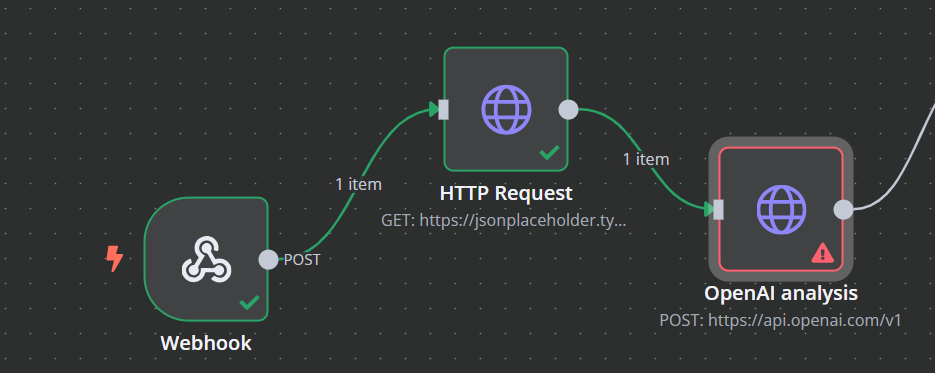
- Save, then click Test step.
AI helps to determine the quality of leads by analyzing the various attributes of the parameters implemented.
- Store lead data in a CRM:
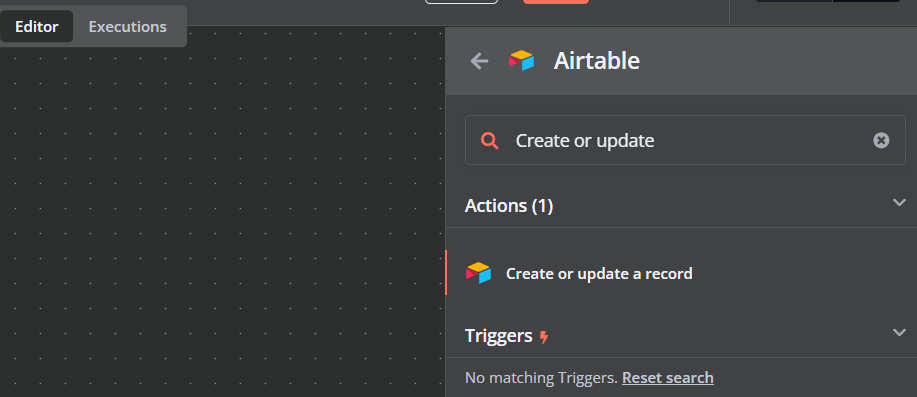
- Click + (Add Node), search for the Airtable node, and select it.
- On clicking Airtable, a search bar will appear with various options underneath. Search for “Create or update a record” and select the Create or update a record Airtable action.
- In a new tab, go to Airtable’s website, sign in to your existing account, or sign up for an account and verify your email.
- Click on your profile avatar in the top right corner.
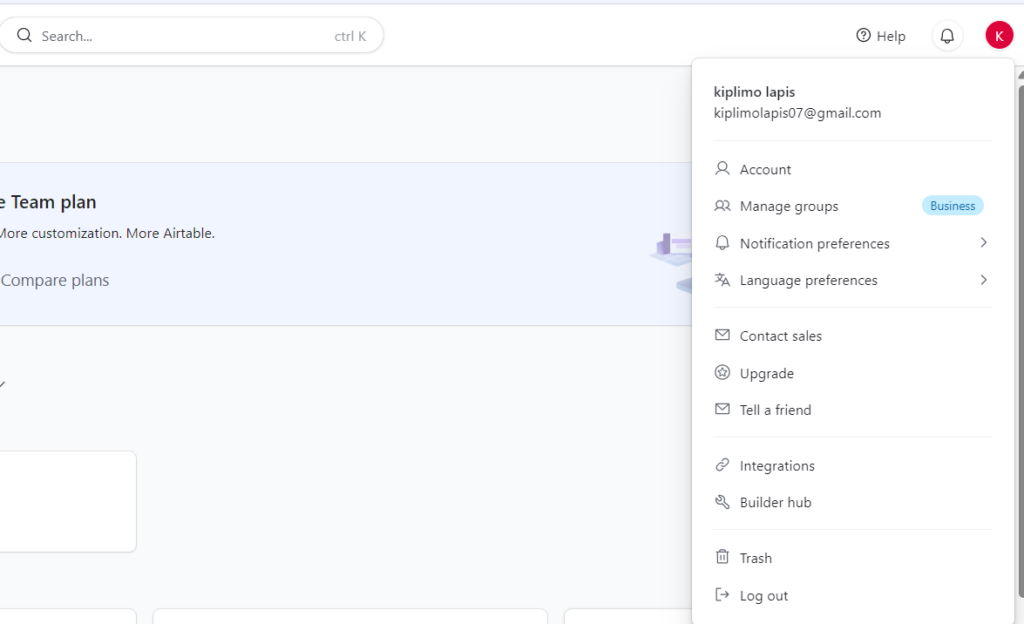
- Click on Builder hub to navigate to the token creation page.
- On the personal access token page, click + Create new token in the upper right corner.

- Give your token a name, then under Scopes, select permissions to Read and write records and Read base schema.
- Under Access, choose which workspaces or bases this token should grant access to.
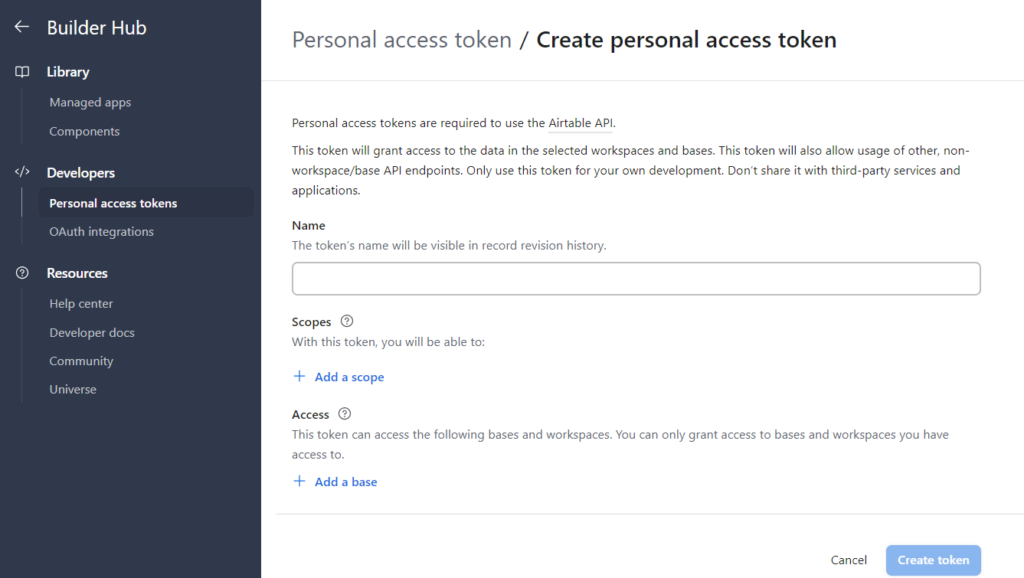
- Click on Create token, then copy the generated token and keep a record of it as it won’t be displayed again.
- Return to the n8n workflow canvas and click the Airtable node to open its settings.
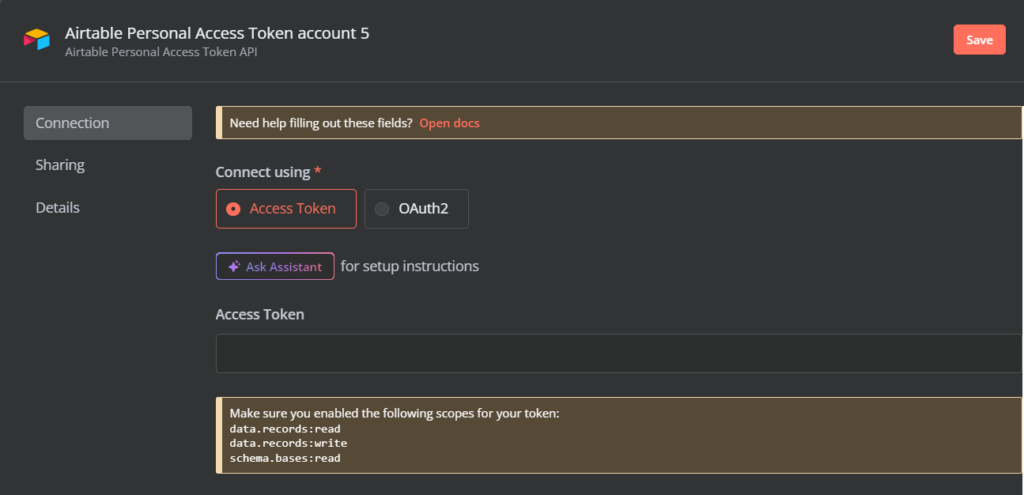
- Under the Credential to connect with dropdown click + Create new credential.
- Under connect using select access token and paste the token you copied and saved earlier, then click the Save button in the upper right corner.
- On the Airtable node settings, choose Create as the operation.
- Select the Base ID and Table name as created in the Airtable workbench.
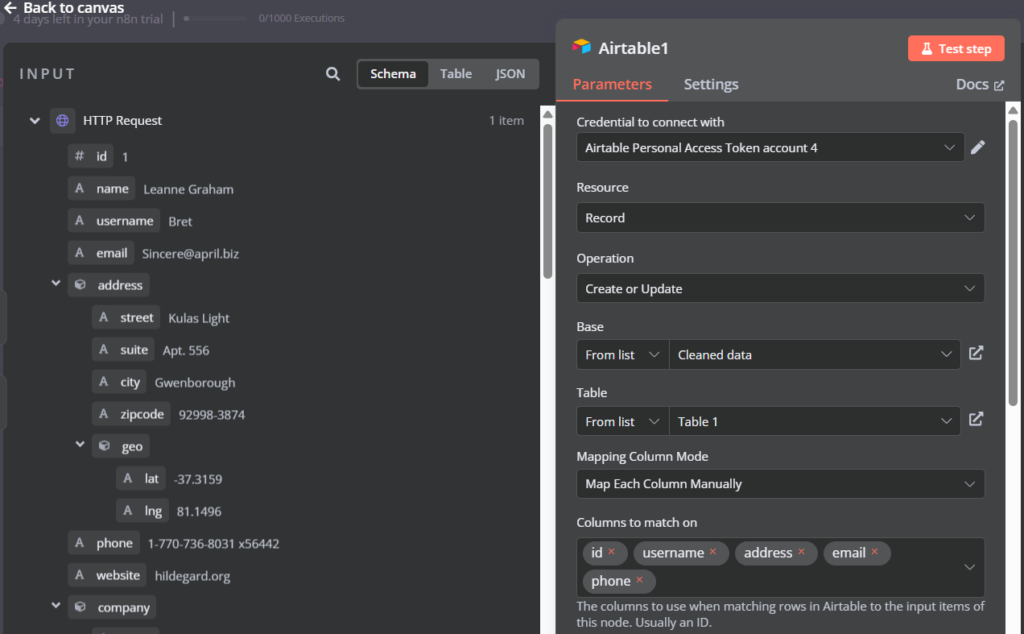
- Save, then click Test step and map the necessary data fields.
Leads are stored in the Airtable for future tracking and follow-up.
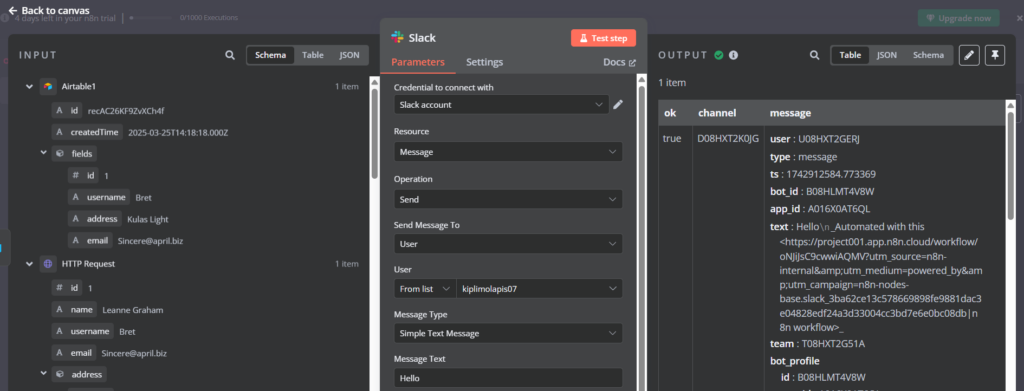
- Send notification to the sales team:
- Click + (Add Node) and add a Slack node.
- Open the Slack node and set the action to send a message. You’ll need to OAuth2 API as the authentication method. You’ll also need to create a Slack App in your Slack workspace, with Incoming Webhooks enabled and OAuth scopes including chat and channels added. Copy the Client ID and Client Secret from your Slack App and enter them in the node settings to complete the OAuth2 authorization flow.

- Configure the message body with lead details. For example:
A new lead has been generated:
{{$node["Webhook"].json["name"]}}
({{$node["Webhook"].json["email"]}})
- And you can include scoring data from the AI analysis – for example:
Lead score:
{{$node["OpenAI"].json["score"]}}
- Save, then click Test step.

Pro Tip
You may want to try formatting messages with Slack’s block kit, or direct messages to specific channels or users based on lead parameters.
This workflow can be used to qualify inbound leads, personalize email campaigns, or automate follow-ups for high-value prospects. By integrating AI with n8n, businesses can streamline lead management, improve sales efficiency, and drive higher conversions with minimal manual effort.
Building a DevOps workflow in n8n
With n8n, you can automate key DevOps tasks such as CI/CD deployments, infrastructure monitoring, and alerting by integrating various tools like GitHub, Docker, AWS, and Slack.
This guide will show you how to create an efficient DevOps automation workflow in n8n with minimal coding.
Why it matters
This workflow automates the process by detecting code changes in GitHub, running automated tests, and deploying updates only if they pass, ensuring smoother and more reliable releases. With real-time Slack notifications, teams stay informed about build status, reducing downtime and improving collaboration.
Steps:
- Set up a trigger from GitHub:
- Click + (Add Node) and search for “GitHub.”
- Select the GitHub node and choose On push under Triggers.
- Authenticate with GitHub and select a repository.
- To trigger the workflow, choose the following Events: Repository, Push, Pull Request, and Star.
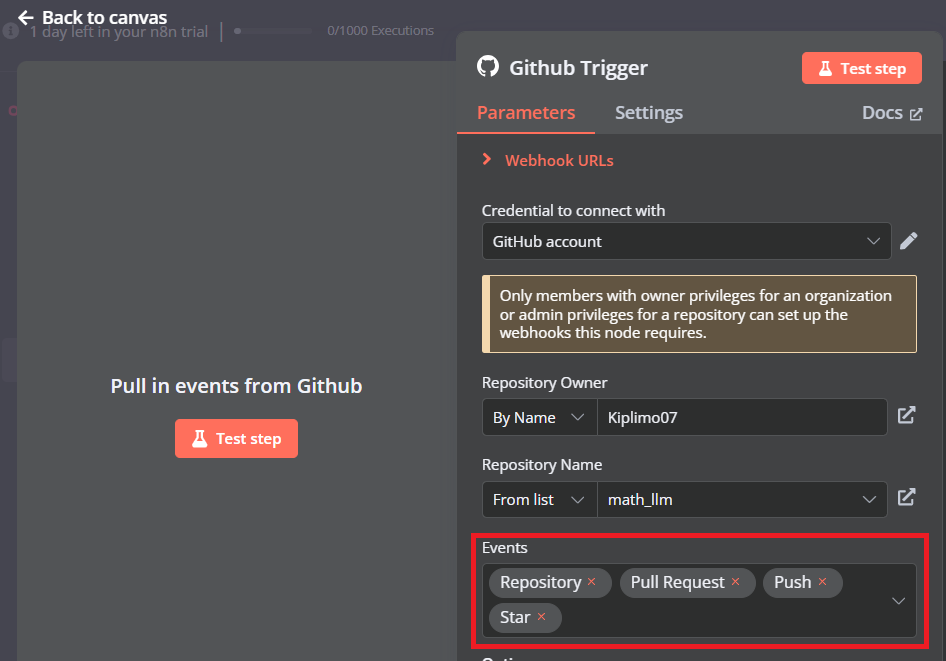
- Save, then click Test step.
This ensures automated testing begins whenever new code is pushed.
- Run automated tests:
- Click + (Add Node) and find the HTTP Request node.
- Set HTTP Method to POST.
- Enter the API URL of the CI/CD service.
- Configure authentication as Predefined Credential Type.
- Set Credential Type as GitHub AOuth2 API (this may vary depending on the specific service). The payload structure will depend on your CI/CD service’s API requirements.
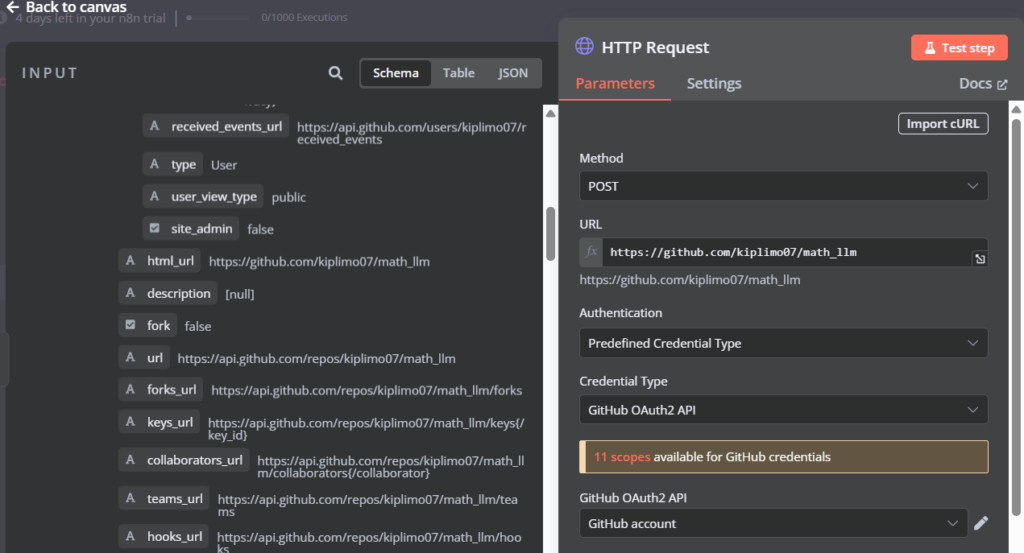
- Save, and click Test step.
- Deploy if successful:
- Click + (Add node) and add SSH.
- Select the Execute a Command action.
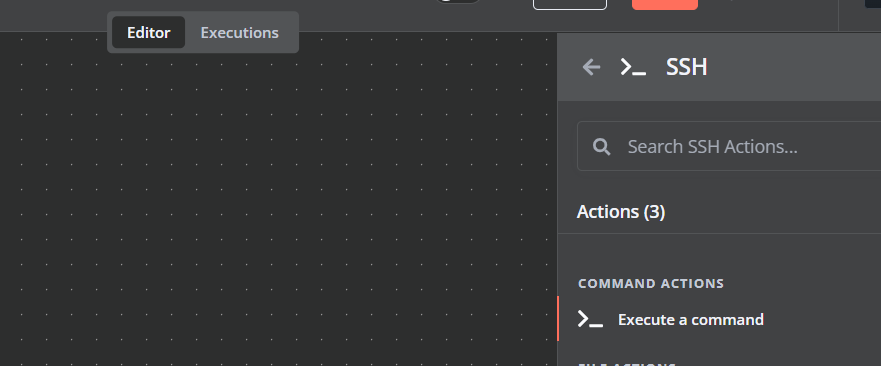
- Click on the node to open it and enter the server credentials.
- Define deployment commands.
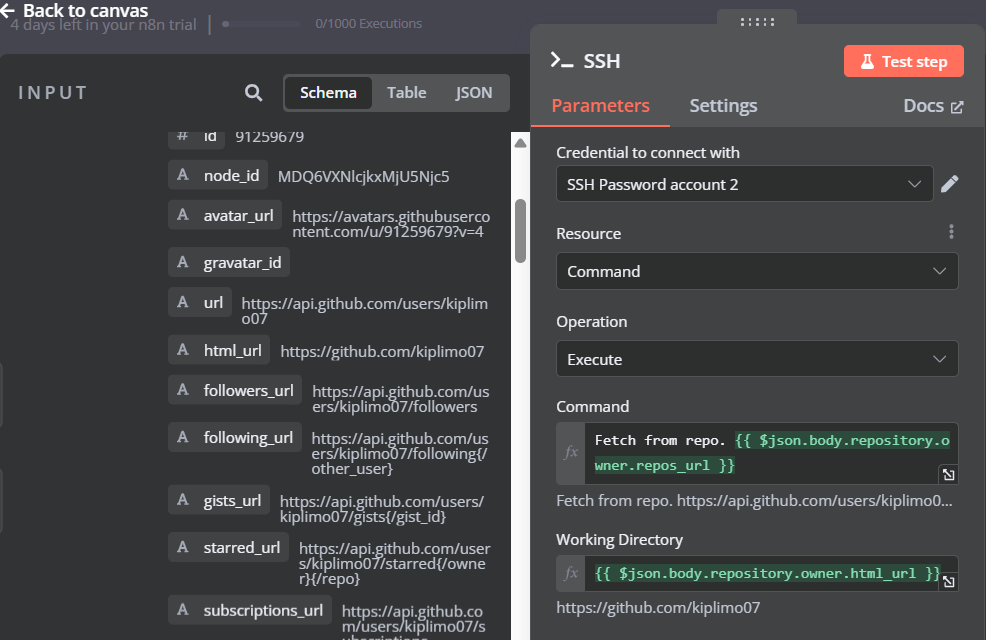
- Save, and click Test step to execute the node.
- Send notifications:
- Click +(Add Node) and add a Slack node.
- Set the action to send a message.
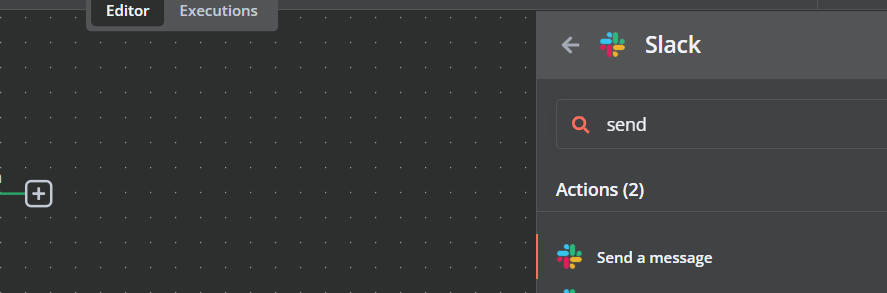
- Send a notification with test and deployment results.

This workflow can be used to automate software deployments, ensure code quality with continuous testing, or streamline incident response.
By leveraging n8n for DevOps automation, teams can reduce manual workload, improve deployment efficiency, and maintain system reliability with minimal effort.
Building an AI-powered data classification and archiving workflow in n8n
With n8n, you can automate the entire backup and archiving process by integrating AI to categorize, compress, and store data across multiple locations, such as Google Drive, AWS S3, or an on-premises server.
Why it matters
Manually managing backups can be inefficient and prone to errors, risking data loss or non-compliance.
This workflow automates the process by retrieving files from cloud storage, using AI to classify and tag data, and scheduling regular backups, ensuring better organization and faster retrieval.
With automated alerts, admins stay informed about backup status, improving security, efficiency, and data reliability.
Steps:
- Schedule backups:
- Click the + (Add Node) button in the top right corner of the n8n workflow editor.
- Search for and select Schedule Trigger.
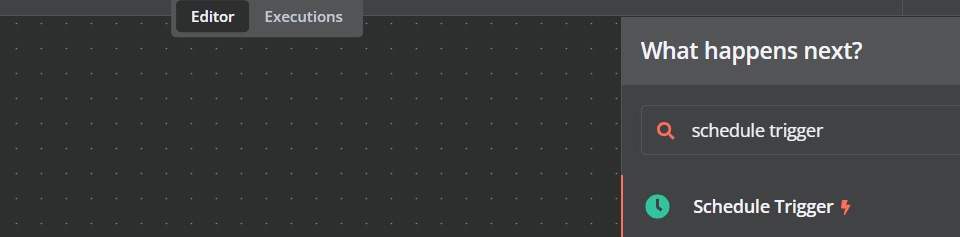
- Set the Trigger Interval at 24 Hours for daily backups and click Test step.
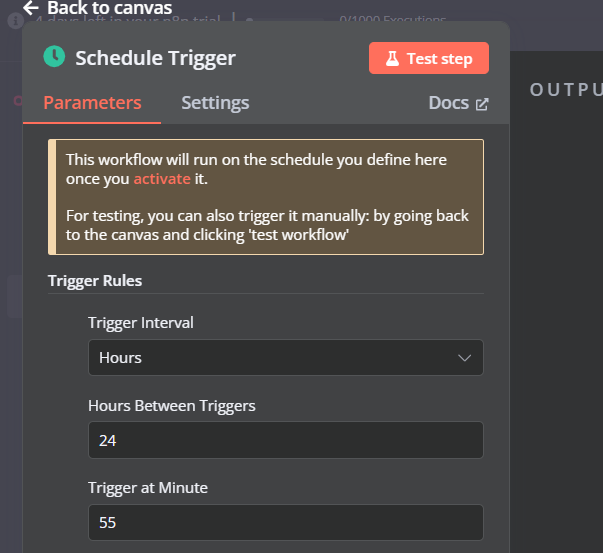
This Schedule Trigger acts as a timer, triggering the backup process at a predefined frequency.
- Retrieve files for classification:
- Navigate back to the canvas, click + (Add Node), and search for Google Drive.
- Select Google Drive and choose Download file action.
- Set up Google Drive credentials and enter your Client ID and Client Secret. Save when done.
- On the editor canvas, drag the arrow [+] from the Schedule Trigger node to the Google Drive node to connect it.
- Double-click the Google Drive node to open its settings.
- Authenticate your account by providing API credentials.
- Select the folder or files that need to be classified and backed up.
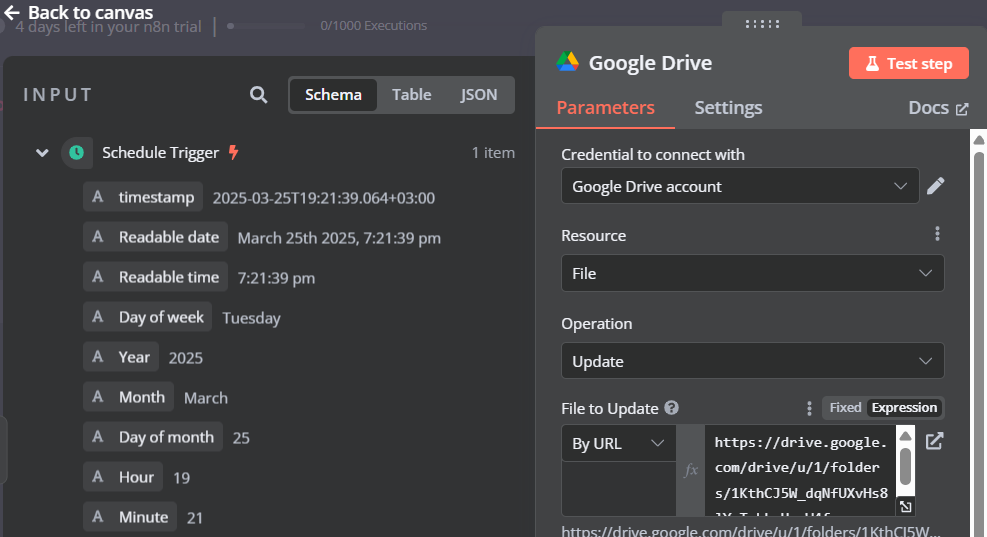
- Save, and then click Test step to test file retrieval.
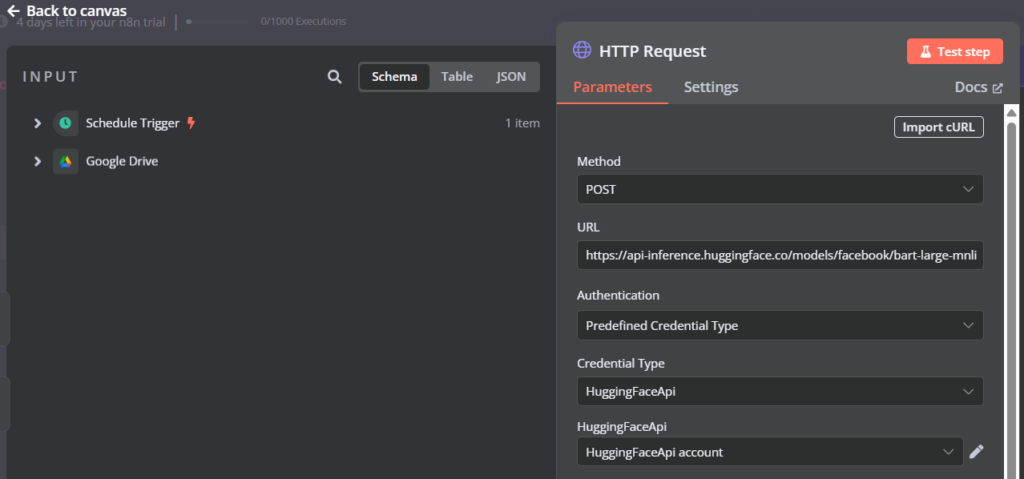
- AI-based classification:
- Click + (Add Node) and search for “HTTP Request.”
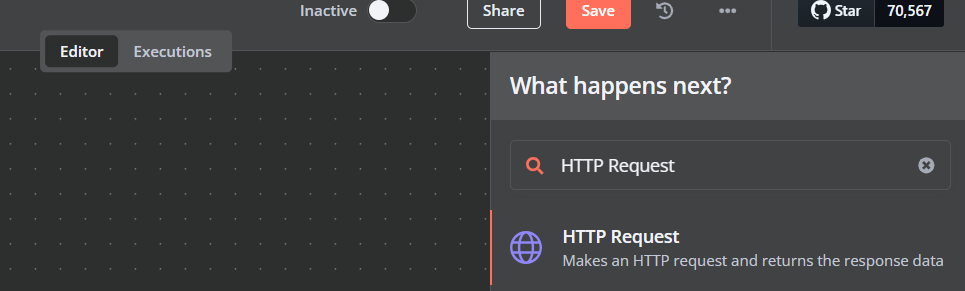
- Select the HTTP Request node and connect it to the Google Drive node.
- Click on the HTTP Request node to open its settings.
- Set the HTTP Method to POST.
- Enter an AI-powered API URL. We will be using the Hugging Face API.
- Under Authentication, choose Predefined Credential Type, and set Credential Type to HuggingFaceApi.
- Toggle Send Query Parameters on and add JSON script to classify data into the appropriate category based on filename.
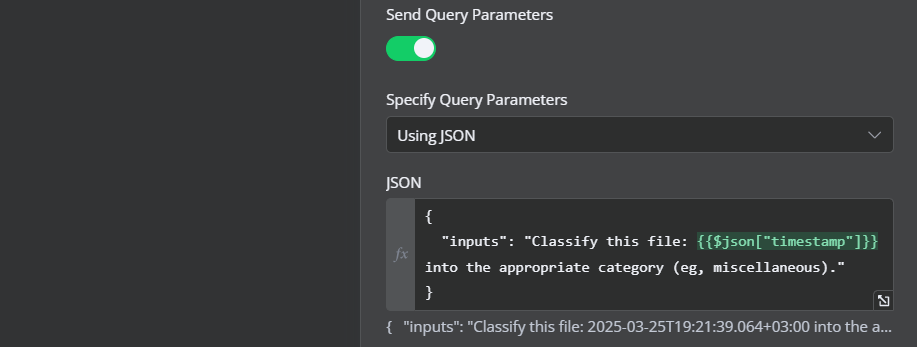
- Save, and Test step.
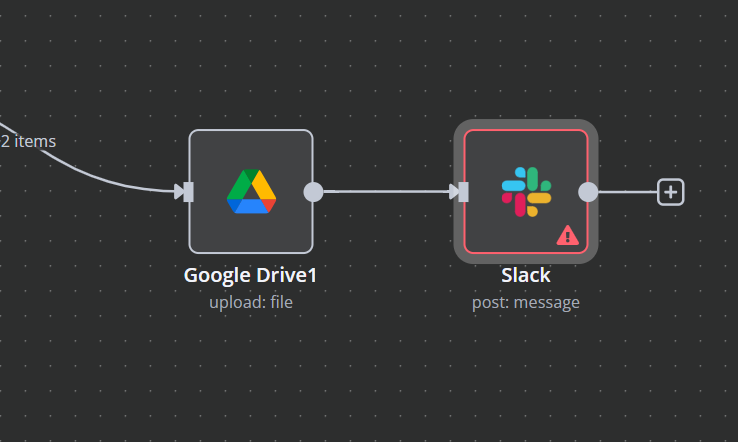
- Store backup securely:
- Click + (Add Node) and search for “Google drive.”
- Select Google Drive and connect it to the HTTP Request node.
- Double-click on the Google Drive node to open its settings.
- Authenticate your cloud storage account.
- Specify the backup folders where the classified files should be stored.
- Save, and then click Test step to upload the categorized backup files.
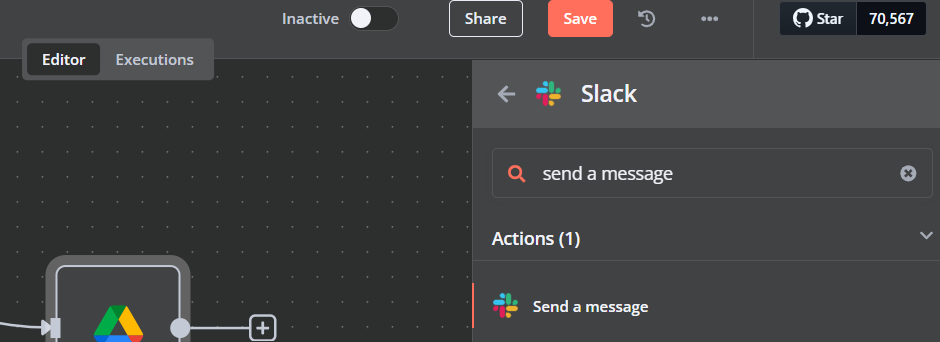
- Monitor and alert:
- Click + (Add Node) and search for “Slack.”
- Select Send a message from Actions.
- Select the Slack node and connect it to Google Drive node.
- Double-click on the Slack node to open its settings.
- Enter the recipient’s Slack address and configure the message body to include backup details.
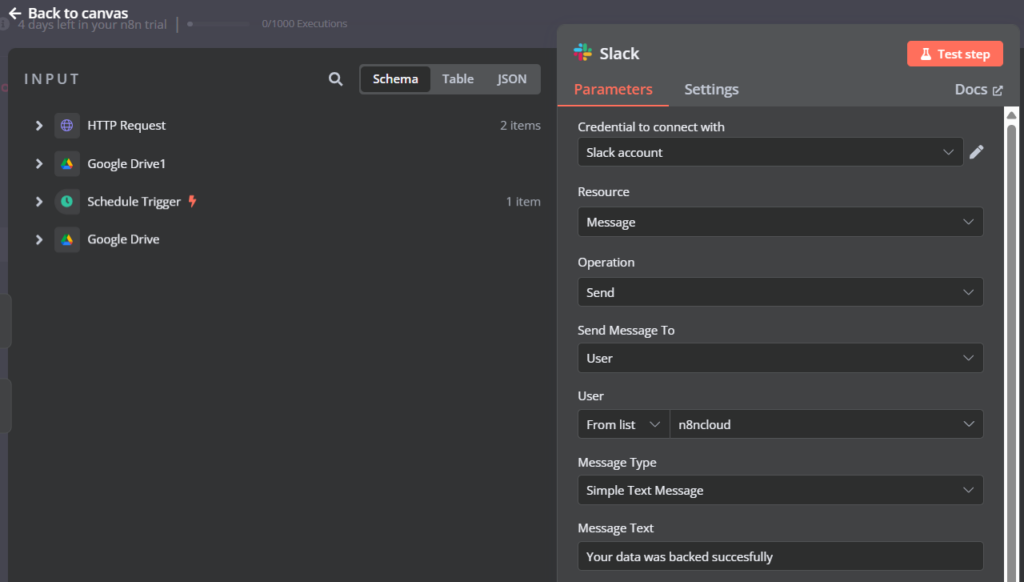
- Save, and click Test step to run the node.
This sends a confirmation message to the IT team or admin users, ensuring they are notified about successful backups.
This workflow can be used by businesses to automate compliance-driven data archiving, ensuring financial records and legal documents are securely stored and easily retrievable.
It can also help organizations manage large datasets, such as media files or research data, by categorizing and backing them up efficiently for future use.
Conclusion
With AI-powered workflow automation in n8n, businesses can work more efficiently, eliminate many tedious tasks, and gain deeper insights into their data.
The workflows in this guide – covering data integration, lead capture, DevOps automation, and AI-based backups – illustrate how n8n can optimize operations across various domains.
By implementing these workflows, organizations can:
- Save time and resources – Automate routine, repetitive tasks, freeing up valuable human resources for high-priority projects.
- Improve data quality – Reduce human error by leveraging AI-driven, structured automation.
- Enhance scalability – Expand workflows as business demands grow, ensuring smooth and efficient scaling.
- Boost decision making – Gain deeper insights with AI-powered analytics, enabling more informed and strategic choices.
If you’re new to n8n, start with a simple workflow and gradually introduce more complexity as you gain confidence. Experiment with AI services, refine automation nodes, and tailor workflows to fit your unique business needs.
With an n8n template on Hostinger’s KVM VPS hosting plans, setting up and scaling these workflows is quick and easy. Leverage the flexibility and reliability of n8n to revolutionize your business processes today!
How to build an AI workflow in n8n FAQ
How do I create a new workflow in n8n?
To create a new workflow, log into your n8n instance, click the + icon in the upper right, and start adding nodes. Define the starting event with a trigger node and connect additional nodes to automate tasks.
How do I integrate AI APIs into my n8n workflows?
Use the HTTP Request node to send API requests to AI services such as OpenAI. Process responses using function nodes for customized automation.
Are there templates available for AI workflows in n8n?
Yes! n8n offers pre-built AI workflow templates that you can customize. Check out our article on n8n templates for these and other ready-made solutions.

I am Kiplimo Luis, a passionate machine learning engineer with expertise in AI-driven solutions. I enjoy building intelligent systems that streamline processes, enhance efficiency, and drive innovation.