I bought a VPS now what? 8 steps to follow after purchasing a VPS
Once you’ve purhcased a virtual private server (VPS), you’ll have to complete several steps before deploying an application or a website.
These measures are crucial to ensure security and compatibility since VPS services are typically self-managed. They might not have any pre-configured software, so the user should prepare the hosting environment manually based on their specific needs.
To help you get started, this tutorial will explain what to do after purchasing a VPS hosting plan, from getting to know your server to integrating a monitoring tool.
What to do after buying a VPS
In this section, we will explain eight necessary measures after you purchase a VPS hosting plan and several Hostinger features that help simplify the task.
1. Understand your VPS
Each virtual private server comes with specific CPU cores, RAM, and storage allocations. These determine how much load your virtual server can withstand and the amount of data it can save.
Web hosting providers commonly provide two operating system options – Linux and Windows. Hostinger’s VPS only supports Linux distros since they are free, more flexible, and perform better than Windows.
Consider installing a control panel like Coolify or Dokploy to simplify VPS hosting management. They both provide a graphical user interface (GUI) for accessing your server files and configurations without using Linux commands.
2. Set up your VPS
Once you’ve figured out your VPS details, let’s proceed with the software installation. At Hostinger, you can configure an operating system and control panel in one click using a VPS template. You might need to use custom commands if you’re using another web hosting provider.

You can then access your VPS via the Browser terminal. This hPanel feature will log you in automatically and allow you to execute commands on your VPS from the browser. Simply go to the VPS overview page on hPanel and click Browser terminal to access it.
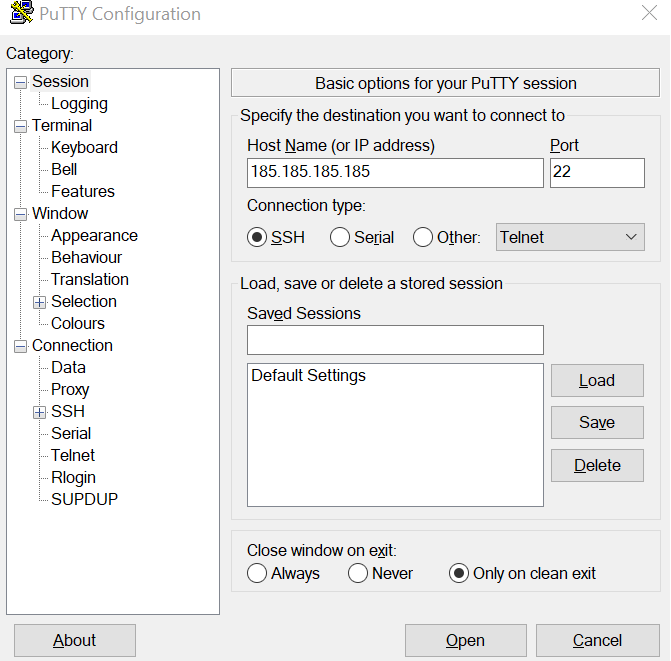
Alternatively, you can use SSH to connect to your VPS. You can use PuTTY to access the Linux server or Remote Desktop for Windows.

By default, you will log in as root. Since this user has the most privileges, running commands and performing server management tasks with it can be somewhat risky if not careful.
With that in mind, let’s create another superuser in your Linux VPS hosting to run administrative commands. We will use AlmaLinux for this tutorial, but the steps should be the same for all distros like Ubuntu or CentOS:
adduser your-username
Enter the new account’s password and contact details. Then, switch from the root to the new user using the following command:
su your-username
You’ll be able to run administrative commands using the sudo prefix with this account once you’ve entered its password.
3. Point your domain
While you can access your VPS using its IP address, you still need a domain name to make the hosted site or application accessible to users. You will also need it to enable HTTPS and set up a custom mail server in the later steps.
There are a couple of ways to point a domain name to your VPS, but the easiest method is changing the DNS record in your registrar’s settings.
To do so in Hostinger, open hPanel and navigate to Domains → Domain Portfolio. Then, find your domain and click on Manage.

Next, click on DNS / Nameservers on the left side menu, and you’ll be taken to the DNS records page.
Under the Manage DNS records section, add two new A records pointing to your VPS IP address. Name them www and @, but keep other configuration values identical.

4. Secure your VPS
To maintain your VPS security, regularly run the update command to install the latest version of all software. Here’s how to do so in AlmaLinux:
sudo dnf update && sudo apt upgrade
For other distros, replace dnf with their corresponding package manager, like apt for Debian and Ubuntu VPS. If you use Windows, follow the guide on updating your server software.
In addition, configure firewall rules on your VPS to block malicious traffic that can compromise its safety. Hostinger users can set up the firewall from hPanel by simply going to VPS overview → Security → Firewall. You can also do this using Linux’s iptables or Windows Firewall.
Another essential measure is setting up Fail2Ban to block malicious login attempts. Here is the installation command:
sudo dnf install fail2ban
Additionally, consider changing the default SSH port since the default one is often exploited. You can do so by opening the SSH configuration file with this command and changing the corresponding setting.
sudo nano /etc/ssh/sshd_config

While not mandatory, we also recommend setting up SSH keys to secure your connection properly. These are additional login credentials that help protect your server if the username and password are compromised.
Lastly, install a secure sockets layer (SSL) certificate to encrypt the connection between your server and clients. You can do so using Certbot via your command line interface or your hosting management panel’s feature.
For example, set it up in Cyberpanel by going to the main dashboard → SSL → Manage SSL. Select your VPS domain and click Issue SSL. Then, go to Websites → List Websites → Manage → Rewrite Rules and select force HTTPS.
5. Install a web server
Now, install the web stack to host your website or application. The first component is a web server, a software that takes clients’ requests and displays the queried content.
Important! If you use Hostinger’s VPS templates, you don’t need to configure a web server and other web stack components as they are pre-installed.
Some popular web servers are Apache, NGINX, and OpenLiteSpeed. Unless you need a specific one, we recommend OpenLiteSpeed due to its high performance and extensive compatibility.
To help you make an informed decision, check out our WordPress on KVM tutorial to learn more about their performance. Now, let’s start installing a web server.
At Hostinger, you can use our LAMP stack VPS template to configure Apache or LEMP for NGINX. OpenLiteSpeed templates are also available, but they are pre-configured with other software.
Use commands if you want to install the web server separately. To learn more about the steps, check out the OpenLiteSpeed setup guide.
6. Add email and database services
Another component of a web stack is a database, which stores and retrieves user information upon request. It enables your website to show dynamic content that automatically changes based on specific queries.
There are various database management systems (DBMS), like MySQL, MariaDB, and PostgreSQL. The setup process varies depending on the databases. For example, run the following commands to install MySQL on an AlmaLinux VPS:
sudo dnf install mysql-server
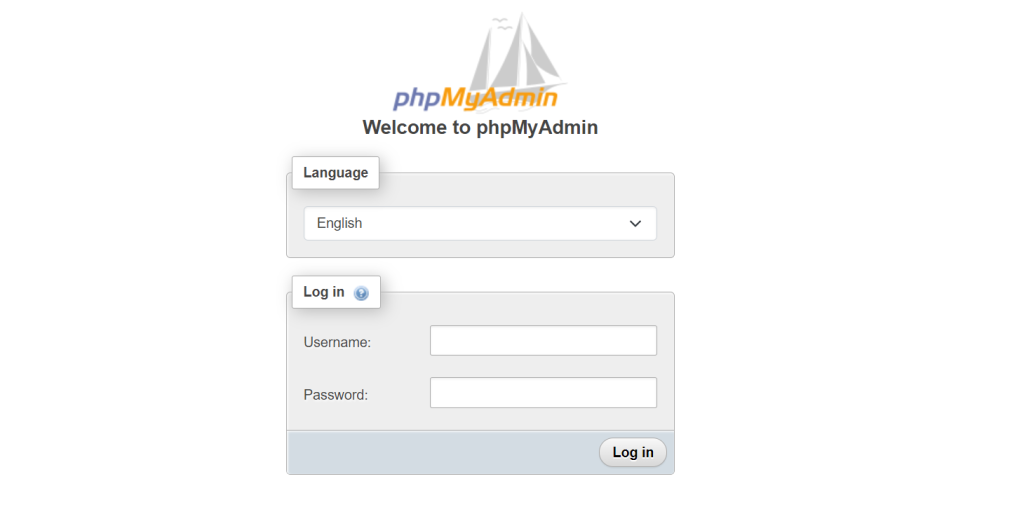
While optional, we also recommend setting up phpMyAdmin. Instead of using commands, this control panel provides a graphical interface to help simplify MySQL database administration.
To learn more about how to set it up, check out our installing phpMyAdmin on CentOS tutorial, which should also work for other RHEL-based distros like AlmaLinux. Once configured, you should be able to access the panel by visiting this link:
yourvpsdomain.tld/phpmyadmin

Log in as the root user you created during the MySQL installation process. To connect the database with your application, add the PHP mysql_connect function to your index.php file.
We also recommend setting up a private mailing service with your domain to improve deliverability. The easiest way to do so is by hosting a custom mail server on CyberPanel.
7. Deploy your first web application
After the web stack is configured, let’s proceed with the web application deployment. The steps slightly differ depending on whether you build it using a framework or content management system (CMS).
Hostinger VPS supports popular CMSs like WordPress and frameworks like Laravel, which you can configure using templates or commands. Several management panels also provide an installer feature.
For example, install WordPress via CyberPanel by going to the Dashboard → Websites → List Websites → Manage. Scroll down to the Application Installer section and select WP + LSCache. Enter the site information and click Create Website.

Once installed, visit yourdomain.tld/wp-admin to access the WordPress admin dashboard and configure your web page. Navigate to the Plugin menu and install plugins like WordFence to optimize security and enable caching using LiteSpeed.
For frameworks, you must use Hostinger’s VPS template or commands to install it. Once configured, push the files to the server from a Git repository via SSH or using file transfer protocol (FTP).
8. Monitor and maintain your server
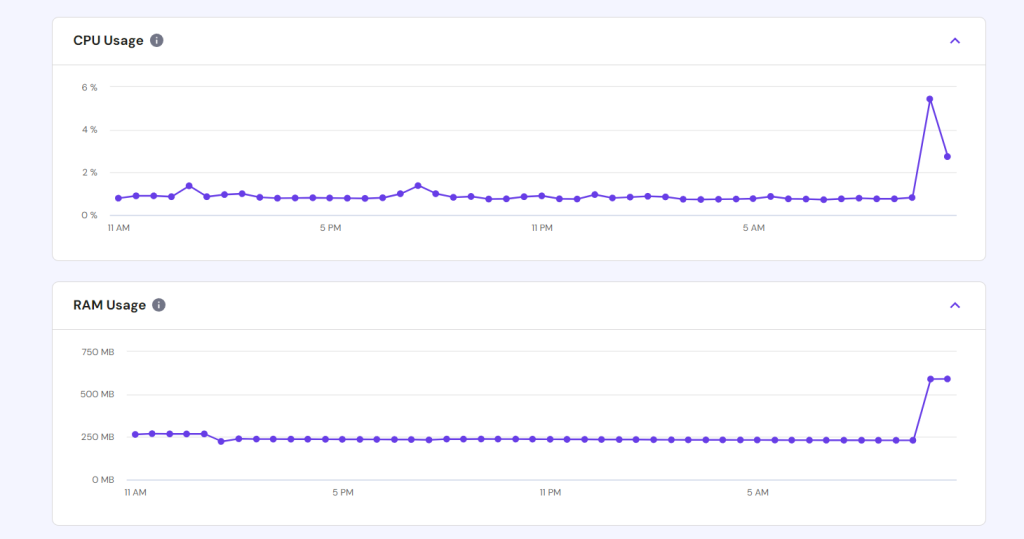
Regularly monitor your server performance to ensure your website or application is responsive. You can use tools like Grafana or Prometheus, but setting them up can be complicated.
For basic resource tracking, use your management panel’s built-in monitoring feature. In hPanel, you can access it by going to VPS → Manage → Backups & Monitoring → Server Usage.

Also, regularly update your server software to maintain security. To simplify this recurrent task, set up a cron job script to schedule its execution.
Moreover, enable automatic VPS backup to ensure data safety using your web host’s feature or cron job. By default, your system will create the archive file locally.
We recommend using an additional off-site backup solution to protect your files from potential physical damage. A popular provider of such a service is Google Drive.
Need Help Managing Your VPS Hosting?
Use Kodee, Hostinger’s own VPS AI assistant, to help with server maintenance and troubleshooting. You can generate instructions and commands for your needs using simple prompts.
Conclusion
Since VPS hosting is typically a self-managed service, users should follow a variety of steps to prepare their hosting environment. After understanding the server’s hardware and software compatibility, install an operating system like Linux.
Then, access your VPS via SSH to create a new superuser and set up security software, including a firewall and SSL. Install a web stack according to your application requirements and optional software like a hosting management panel.
Configure a CMS or framework and deploy your application to the server via FTP. Lastly, a monitoring tool like Prometheus should be set up, and a cronjob script should be created to automate regular tasks like backup and updating.
I bought a VPS now what? FAQ
In this section, we will answer several questions users often ask after purchasing a VPS hosting plan.
What to Do on a New VPS?
The most critical steps are installing an operating system, setting up a new root password, creating a superuser, and configuring security tools. Then, install the web stack, such as the web server and database, based on your hosting needs.
Can I Host Multiple Websites on a Single VPS?
Absolutely! To host multiple websites on a VPS, create a dedicated folder within your web server’s root directory for each domain. Then, upload index.php and other page files into the location.
How Do I Install a Web Server Like Apache or NGINX on My VPS?
At Hostinger, you can install the Apache, NGINX, or OpenLiteSpeed web server using the operating system template via hPanel. Alternatively, you can do so using the apt install command via SSH.
What Is the Best Way to Monitor the Performance of My VPS?
The best way to track your VPS performance is by integrating it with a monitoring tool like Prometheus and Grafana. Alternatively, you can use Hostinger’s VPS monitoring tool directly via hPanel, but the information is not as comprehensive.

