How to create a community web app
Community web apps, like Reddit and Discord, bring people together around shared interests or activities. They create spaces for users to discuss ideas, share content, and support each other.
Sure, there are already plenty of platforms out there, and some are quite popular. But if you create your own community web application, you can tailor the features and design to fit your preferences like a glove.
It also lets you build something that meets your community’s needs and strengthens users’ sense of belonging.
It might sound daunting to build one from scratch, especially with all the programming code involved, but it doesn’t have to be. With AI tools like Hostinger Horizons, you can create your app simply by typing prompts – no coding needed.
In this guide, I’ll show you how I developed my community web app, from the first idea to launching it live. Don’t worry if you’ve never built an app – the steps are manageable even for beginners.
Let’s jump right in!
Planning my community web app
I’ve used many community web apps before, but third-party platforms often had issues. Some prioritized commercial interests over user needs, while others had frustrating restrictions, such as being inaccessible in certain regions.
Then there were the troll accounts – constant spam, off-topic comments, and heated arguments that moderators couldn’t always keep under control.
That’s when I realized I needed my own community web application that would focus on what matters to me and the people I want to connect with. Here’s what I wanted to include:
- Discussion forums – organized by categories so users can participate in threaded conversations.
- Media sharing – users can upload photos and videos to relevant threads, making discussions more engaging.
- Polls – users can add optional polls to threads with a question and multiple options.
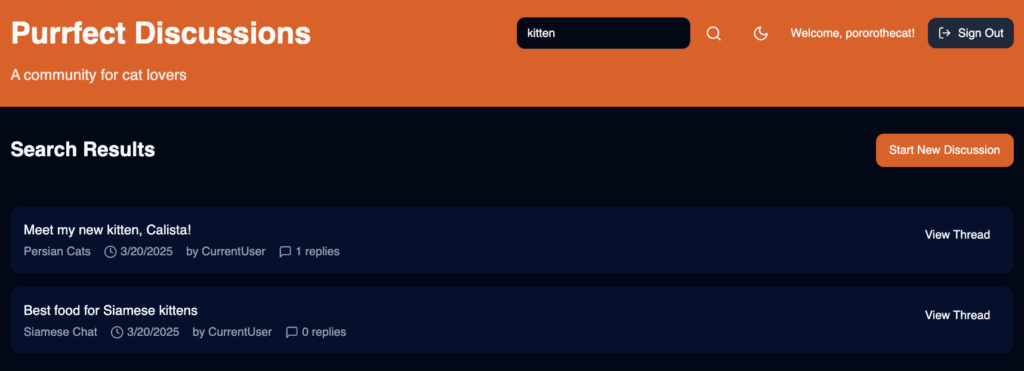
- Custom design – elements like a sticky sidebar, a search bar, and dark mode for a better user experience.
- User login and registration – for inviting family, friends, and like-minded people to join quickly.
These are just the core functionalities. As the community grows, I plan to expand the app with more features to improve engagement and usability.
Why I chose Hostinger Horizons
Since I wanted to bring my idea to life quickly, I went with Horizons AI App Generator. It’s an AI-powered tool that creates web apps based on simple prompts – no need to write long, complicated code or deal with frontend and backend logic.
What really stood out to me was how effortless the process was:
- No coding required – all I had to do was describe what I wanted, and Hostinger Horizons handled the rest.
- Instant refinements – I could tweak a feature, adjust the design, or fix a bug by updating my prompts. The AI instantly applied the changes and provided a live preview.
- Multilingual support – the tool works in over 80 languages, so I could describe my app in my preferred language without worrying about technical terms.
- Seamless hosting integration – once my web app was ready, I didn’t have to set up hosting separately. With one click, I published it instantly on Hostinger’s fast and reliable hosting.
Hostinger Horizons has different plans, starting at £16.99/month, with message limits of up to 1,000/month. There’s even a 30-day money-back guarantee, so there’s no real risk in experimenting with it.
How I built my community web app with Hostinger Horizons
With my Hostinger Horizons plan set, it was time for the exciting part: developing my community platform. I created one for cat owners, where we can discuss all things feline – care tips, behavior, health, and everything in between.
If you plan to create a community web app for a different interest group, like book lovers, moviegoers, or pop culture stans, you can easily tweak my prompts to match your vision.
Step 1: Setting up the project
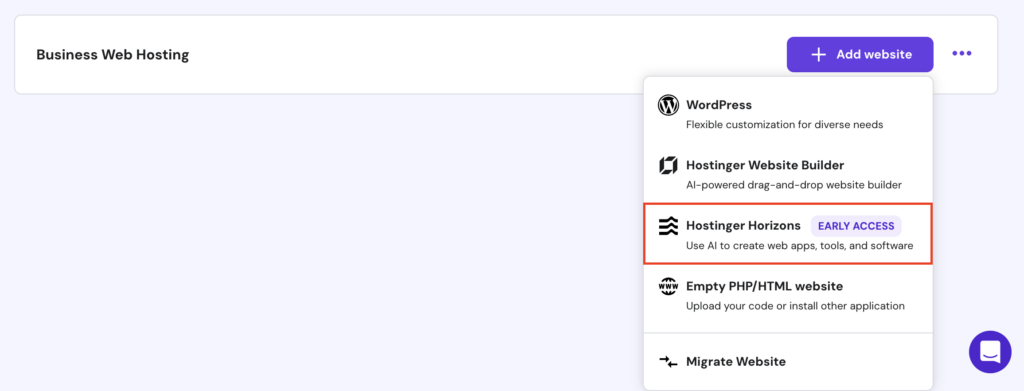
To start, I logged in to hPanel with my Hostinger account and went to Websites → Websites list → Add website → Hostinger Horizons.
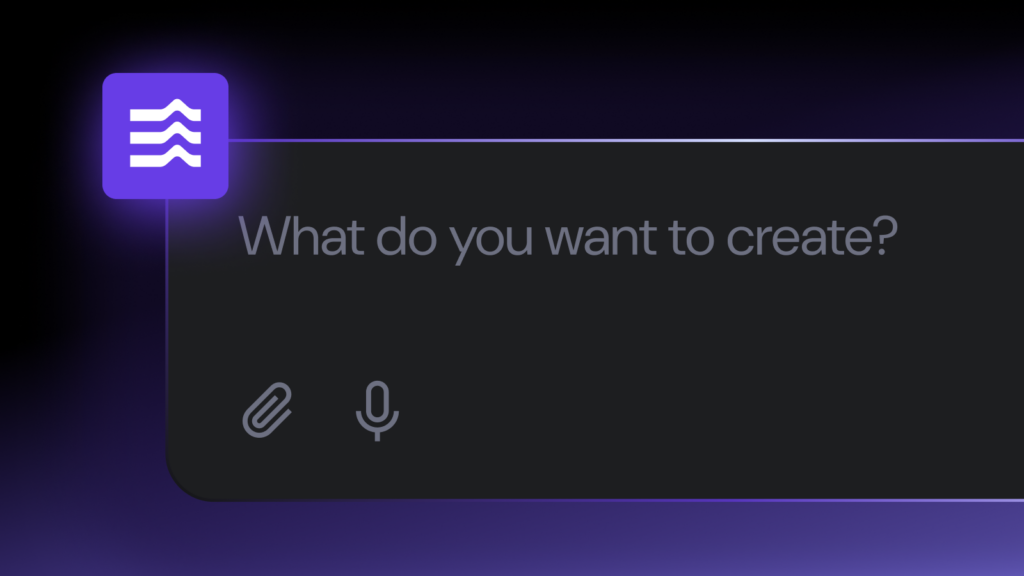
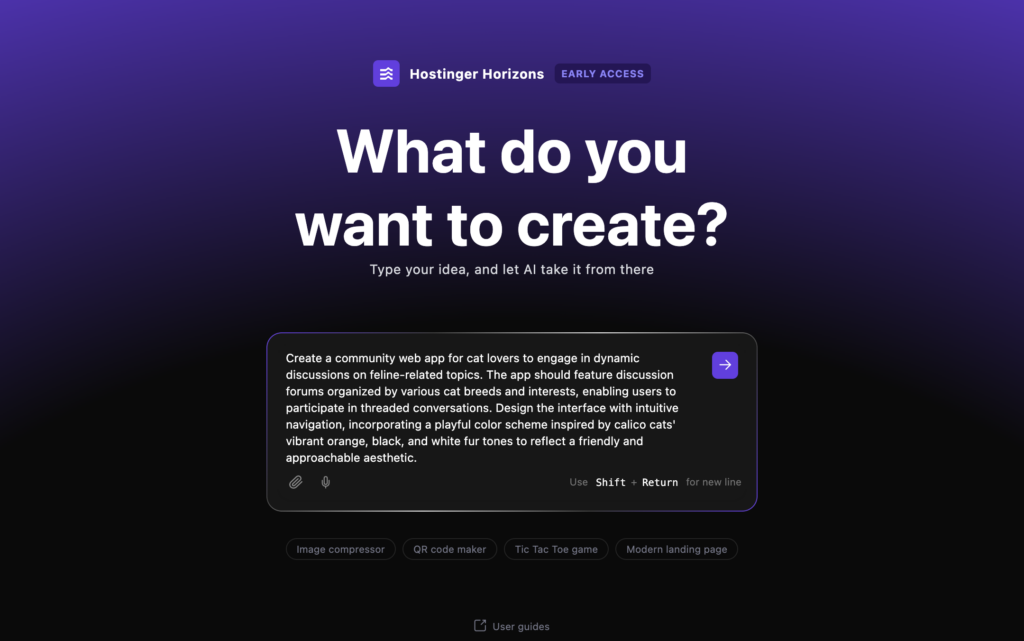
That took me to Hostinger Horizons’ startup screen, where I typed my first prompt to set the foundation for the app:
Create a community web app for cat lovers to engage in dynamic discussions on feline-related topics. The app should feature discussion forums organized by various cat breeds and interests, enabling users to participate in threaded conversations. Design the interface with intuitive navigation, incorporating a playful color scheme inspired by calico cats' vibrant orange, black, and white fur tones to reflect a friendly and approachable aesthetic.
It took a few moments for the tool to process my prompt. As it went to work, the interface split into two panes:
- The left pane is where I typed prompts and interacted with the AI.
- The right pane showed a live preview of the app as it was being built.
Here’s what the first version of my community web app looked like:

Not bad at all! Hostinger Horizons even came up with a pretty cool name for the community: Purrfect Discussions, which shows it can help with copy, not just functionality.
But when I tested it, a few things didn’t work yet – like the buttons to add or open discussions. So, I kept iterating and refining my prompts to get everything working as I wanted.
Step 2: Implementing discussion functionality
The next thing I wanted to tackle was adding the most important feature: forum discussions. I used this prompt:
Implement a full discussion functionality for my web app, so users can start new threads, reply to existing discussions, and upvote or downvote comments. Each thread should have a title, description, and category (e.g., breed-specific, cat care, funny stories, etc.). Ensure threaded replies are easy to follow, with the most recent comments appearing at the top.
Hostinger Horizons successfully implemented the feature and updated my web app accordingly. I tested it by adding a discussion thread like this:
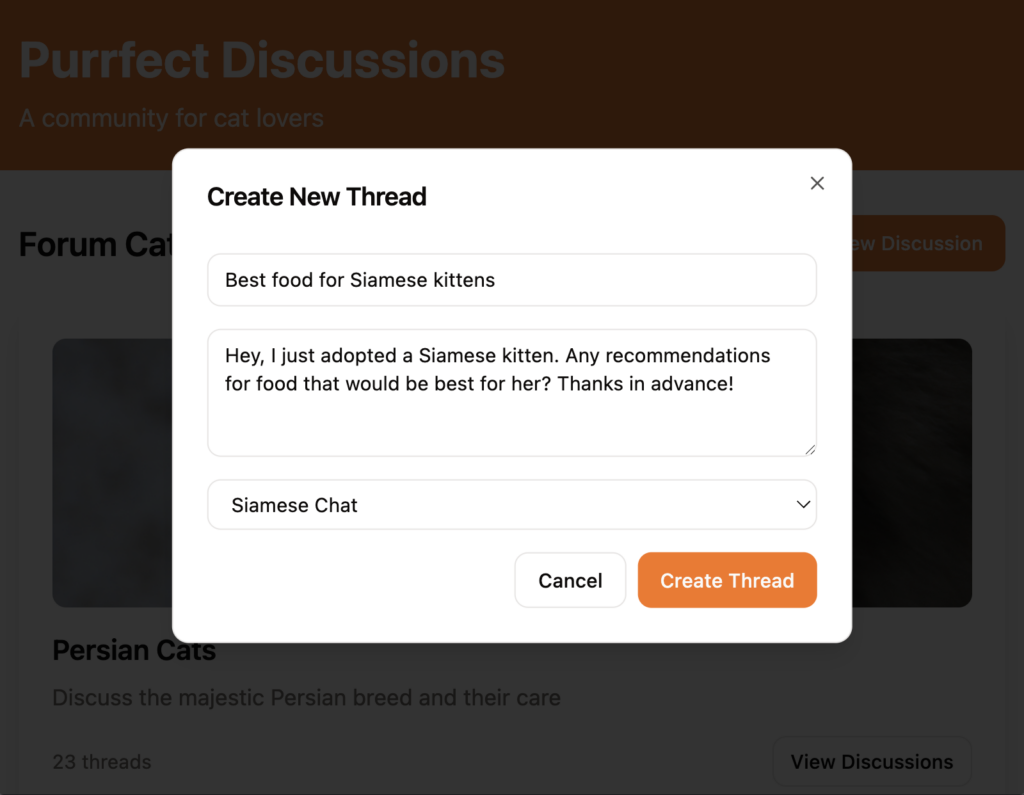
It worked! But when I tried posting a comment and upvoting/downvoting existing ones, none of the changes showed up immediately. I refreshed the page – and there they were.
That’s when I realized the issue: the app wasn’t updating in real time. So, I asked the tool to fix it with another prompt:
Fix the real-time functionality for upvoting, downvoting, and comment posting in the cat lovers' community web app. When users upvote or downvote a thread or comment, the vote count should automatically update without needing to refresh the page. Similarly, when a new comment is added, it should appear in the thread immediately.
Hostinger Horizons nailed it. After that, the forum discussion features worked exactly as I wanted.

Step 3: Including media sharing
What’s the one thing people want from a cat-lover community besides sharing tips or asking questions? Yep, they want to see adorable cat photos from other owners.
But my web app didn’t have that functionality yet. I used this prompt to add media sharing:
Add media upload functionality when creating a new thread. Users should be able to upload images and videos of their cats along with their thread content. The app should support common file formats for images (JPG, PNG, GIF) and videos (MP4, MOV). Ensure the uploaded media is displayed within the thread, and include basic file size limitations and error handling for unsupported file types or large uploads.
As soon as Hostinger Horizons finished processing the prompt, I created a new thread and uploaded a kitten photo:
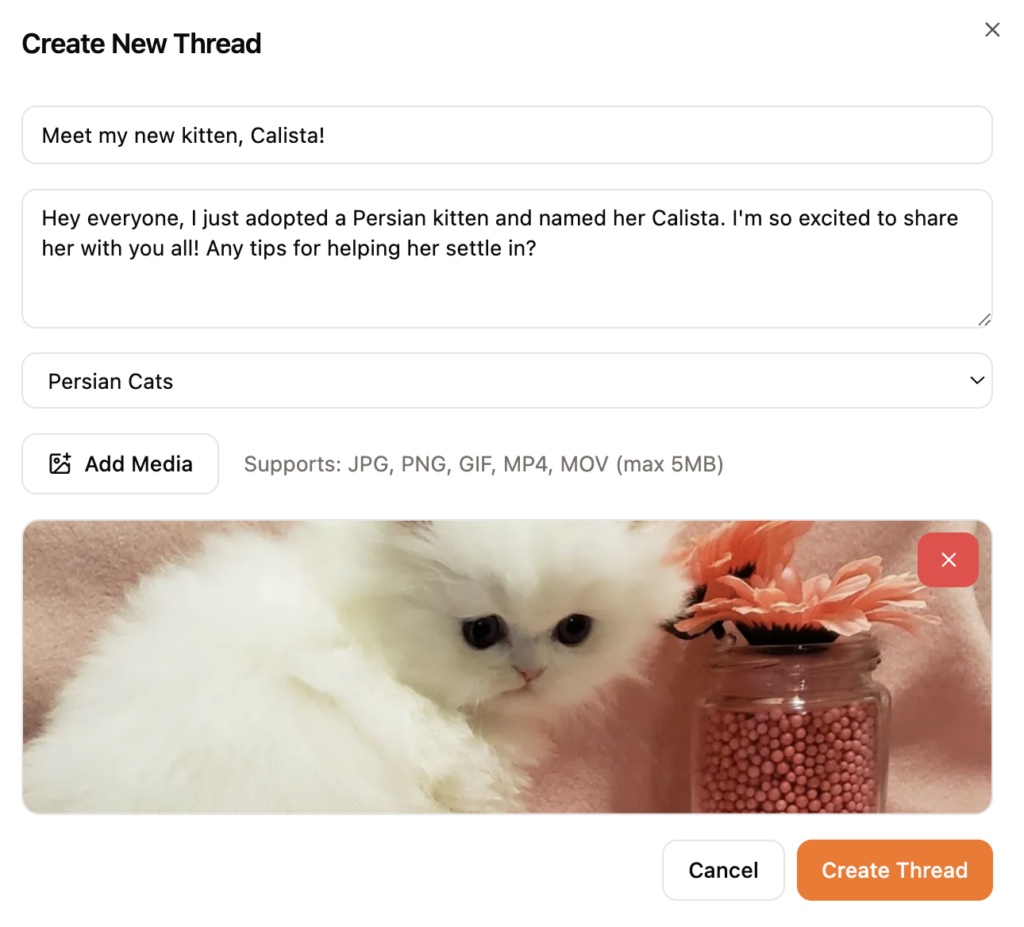
The picture displayed perfectly when I opened the thread.
That was a great start, but I wanted more. Users should be able to upload media in the comments, too. Also, it would be helpful if they could edit or delete their threads and comments in case they made a mistake or changed their mind.
Here’s the prompt I used to upgrade the functionality:
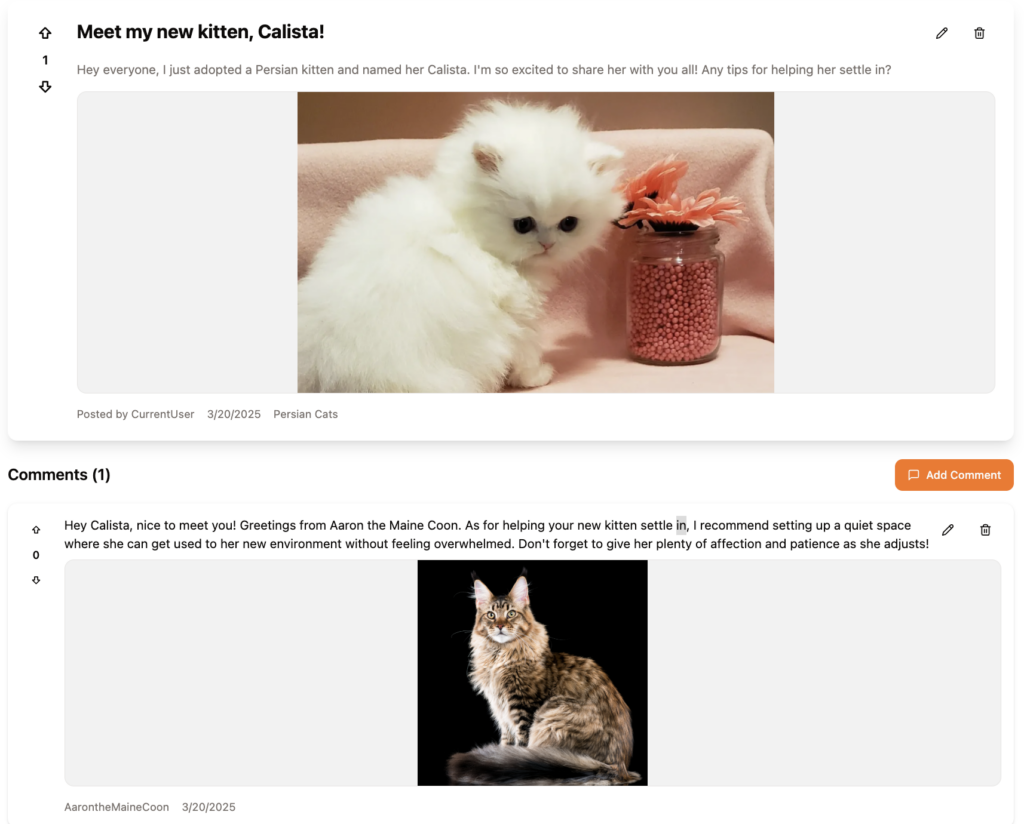
Extend the media upload functionality to comments in my web app by allowing users to add images and videos when posting a comment, just like in threads. Also, implement the ability for users to edit or delete their own threads and comments. They should be able to update content, including text and media, or remove it entirely if needed.
Just like that, the app felt more lively. Users could upload media in both threads and comments, vote on discussions, and update or delete their posts whenever needed.
Suggested reading
Breaking down complex features into smaller tasks – like how I first asked Hostinger Horizons to add media sharing, then later prompted it to support uploads in comments – is just one of many useful strategies when working with the tool. You can find more prompting tips for Hostinger Horizons in my other article.
Step 4: Adding polls to threads
Another common feature in community web apps is the ability to add polls to threads. When other users visit the thread, they can also vote on the poll, in addition to leaving comments and interacting with the content.
So, I asked Hostinger Horizons to implement this feature with the following prompt:
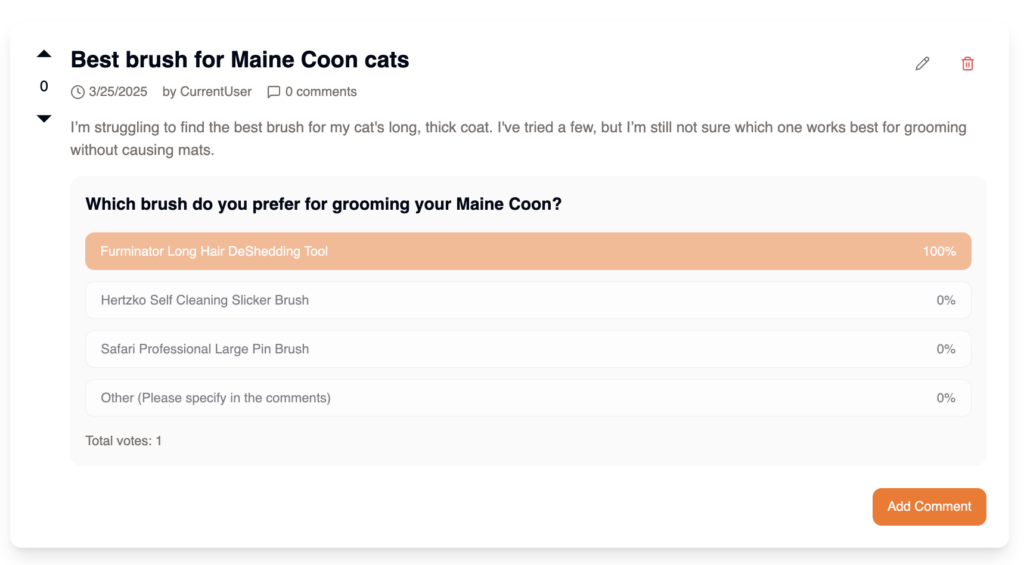
Add an optional poll block when creating a new thread. If a user chooses to add a poll, they should be able to input a question and 2–10 options.

It worked when I tested it initially, but there were a few logical issues. For example, users could vote multiple times, and they could also undo their vote by clicking the same option again – which I didn’t want.
From my experience with similar platforms, users can only vote once and can’t undo their vote. Also, the results should only be visible after voting.
I asked Hostinger Horizons to address the issue:
Voting should be limited to one vote per user. Results should be displayed as bars with percentages. Optionally, users can view the results only after they've voted.
And here’s the result after the fix:
Step 5: Revamping the design
As we saw in the previous steps, the initial design of my community web app was decent. But of course, I wanted to improve it by adding more design elements and refining the layout.
Doing so didn’t just make the app look more appealing; it also improved accessibility and overall usability.
So, I turned to the web app design with Hostinger Horizons article and started applying what I learned.
First, I focused on typography:
Use bold typography for headings (Roboto) and light fonts for body text (Open Sans). Set body text to 18px and headings to 32px for better readability and visual hierarchy.
Next, I redesigned the layout:
Implement a card-based layout for threads and comments. Use light backgrounds, rounded corners, and soft shadows to separate posts. Add color borders/icons for different thread types.
Then, I worked on navigation and usability:
Implement a sticky sidebar for navigation with categories and recent posts, visible only on the thread page. Ensure the sidebar remains visible while scrolling through threads and comments. Additionally, include a search bar that is always visible across all pages.
And finally, I added dark mode:
Create a dark mode with high contrast between text and background. Use dark backgrounds (charcoal/navy) and bright accents (white/light blue) for readability in low light. Include a toggle to switch between the modes next to the search bar.
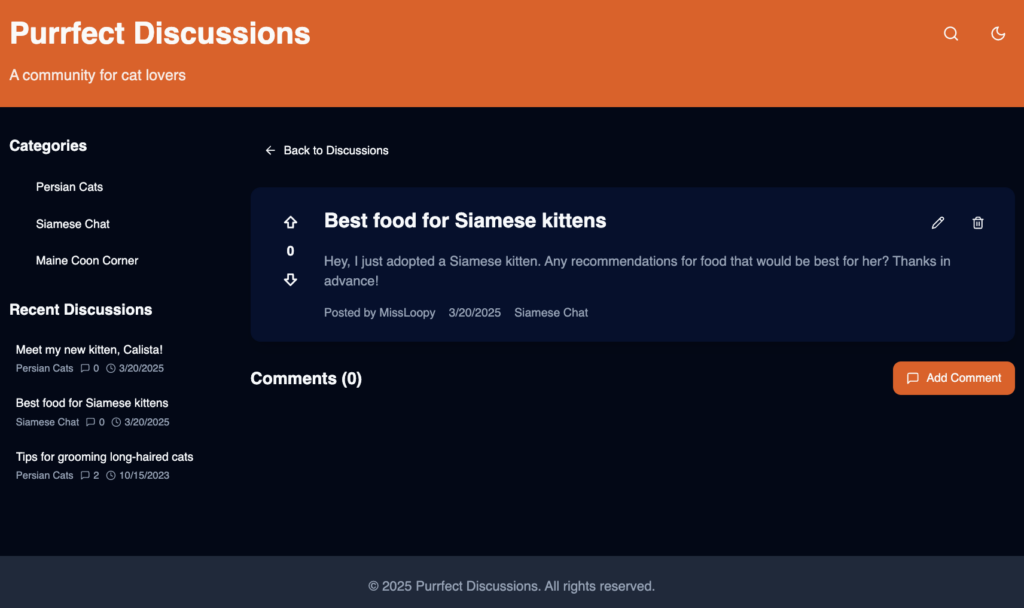
At this stage, my community web app looked like this:
Step 6: Creating a login and registration page
Like I said before, I planned to invite friends, family, and fellow cat lovers to join my web app in the future. I needed to add a login and registration page to let everyone create their account and access the platform easily.
Login and registration setups can vary depending on the developer’s wants, but I kept things simple. Here’s what I went with:
- Fields to sign up with a username, email, and password.
- A login form without the email field.
- A toggle to switch between login and sign-up.
- A link to reset your password.
- A centered error message if something goes wrong.
Based on that, here’s the prompt I used:
Create a login/registration page for my web app. Include the following features:

- Fields for email address, username, and password on the registration page. For the login page, omit the email address field.

- A button for logging in or signing up.

- A link to toggle between the login and sign-up pages.

- A link to prompt the password reset process, with the necessary functionality.

- An error message that appears in the center of the page when invalid data is entered.
But instead of implementing it, the app threw an error:
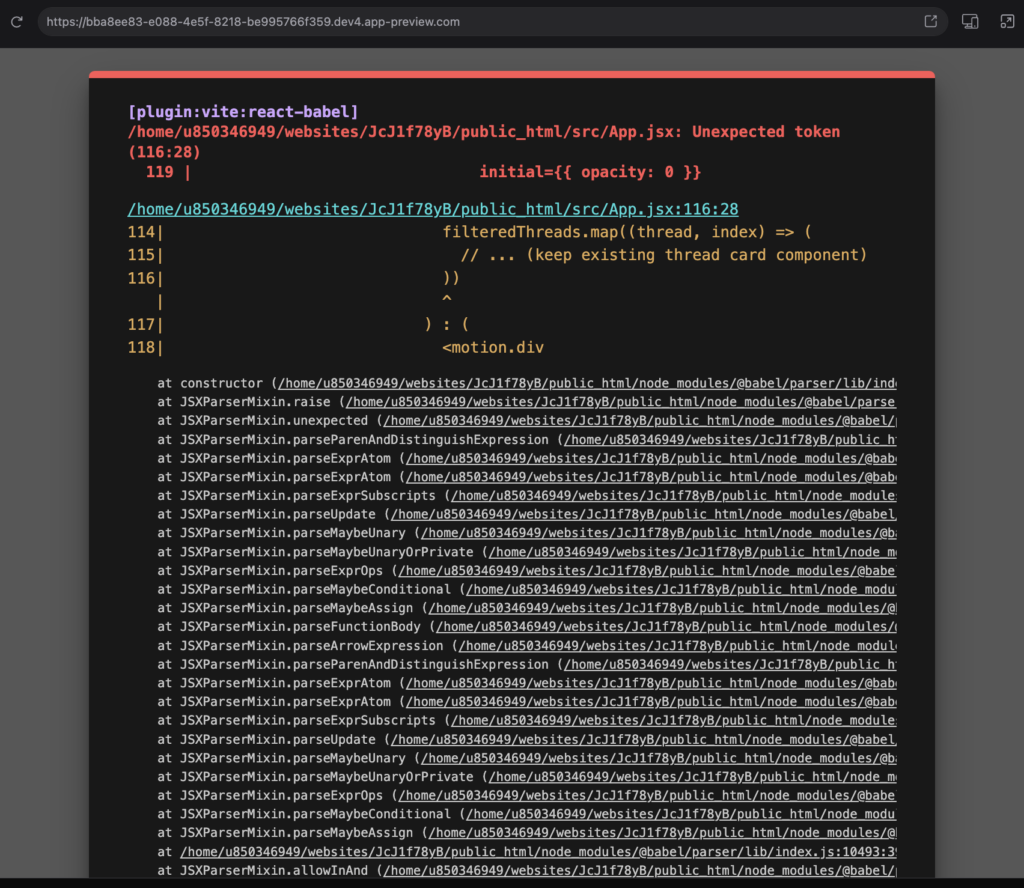
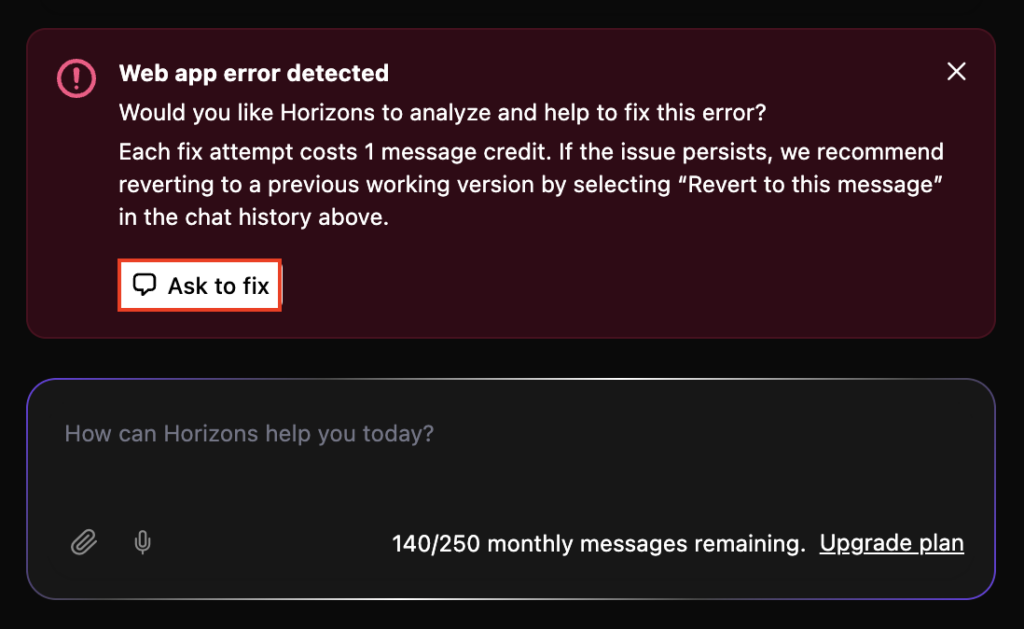
I didn’t panic. Hostinger Horizons is still in early access, so I expected a few hiccups along the way. I clicked the Ask to fix button and let the tool handle it:
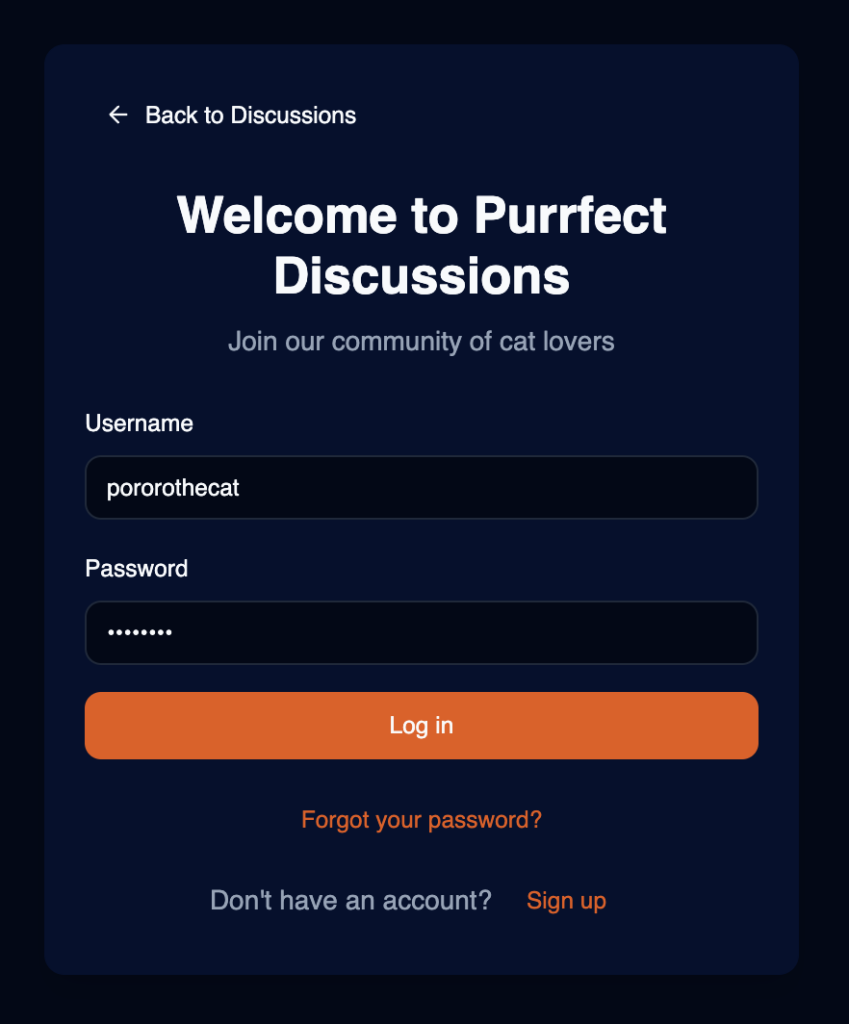
The second time’s the charm. The login and registration page worked perfectly once I tested it by creating a new account. After signing in, the app redirected me to the main page, just as expected.
But something was missing – there was no logout button, meaning users couldn’t log out. Not ideal. I typed one more prompt:
Add a sign-out button to the main page of the web app, which is visible only after the user logs in. When clicked, the button should log the user out and redirect them to the login page.
Here’s how it turned out:
Testing and publishing my community web application
Now that the core functionalities of my community platform were in place, it was time to publish it. But before doing that, I wanted to do a final check by thoroughly testing my web app to catch any issues.
I interacted with it via the right preview pane, clicking every button to ensure it worked, filling in fields to check input validation, testing invalid data to see if it handled errors properly, and checking all features to ensure they worked as expected.
When testing, I recommend creating a checklist of features to test and keeping track of anything that isn’t behaving as expected. This way, you’ll know what still needs attention.
For example, when I tested how my community web app looked on a mobile device by toggling the viewport in the preview pane, I noticed that the discussion thread card was unresponsive – it was too wide and didn’t adjust properly.
So, I asked Hostinger Horizons to fix it with this prompt:
Fix the responsiveness of the discussion thread card. Ensure it adjusts properly to smaller screen sizes, especially for mobile devices.
After ensuring everything was in order, I was ready to launch my app. I clicked the Publish button, and the app went live on Hostinger’s Business hosting plan, which came bundled with Hostinger Horizons, so I didn’t need to purchase separate hosting.

By default, Hostinger Horizons gives you a randomly generated domain for your app. But I wanted to connect a real domain name, so I clicked Get domain and followed the instructions.
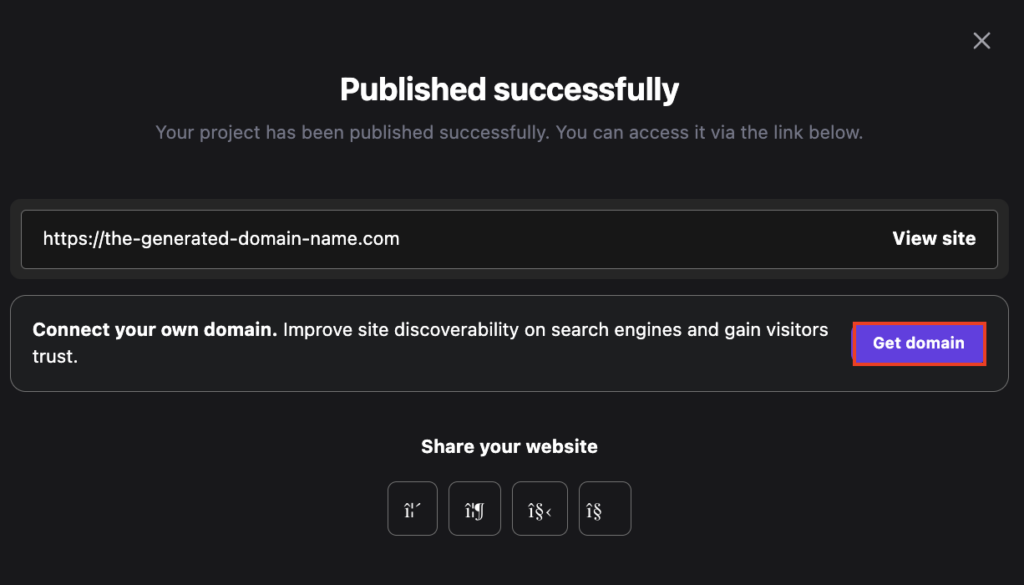
If you’d rather do it later, that’s fine. You can add a domain anytime by going to Websites → Website list and selecting Change domain under your Hostinger Horizons project.
And that’s it! My community web app for cat lovers is now live and ready for users to enjoy!
What’s next?
In this guide, I’ve shown you how I built my own version of a community web app. My app is still far from perfect, but even the most popular community platforms started small, so I’m confident it will grow with time.
Creating this app with Hostinger Horizons turned out to be surprisingly easy and fun. I can’t wait to add more features to my community platform, including:
- User profiles – to let users personalize their accounts and share more about themselves.
- Real-time chat – for instant communication between users, making interactions more immediate and engaging.
- Moderation tools – these will help me manage content, prevent spam, and maintain a friendly and positive environment.
- Database integration – since my app is still growing, I plan to connect it with a database to store user data and enhance security.
Now it’s your turn to develop your own web app. With Hostinger Horizons, the possibilities are endless.
Join our Discord channel for more tips and inspiration on making the most of Hostinger Horizons. Connect with the community, get expert advice, and stay updated on the latest features!

Ariffud is a Technical Content Writer with an educational background in Informatics. He has extensive expertise in Linux and VPS, authoring over 200 articles on server management and web development. Follow him on LinkedIn.